Congratulations on your Mado C-Series Shade
Select your shade type to get started, or connect your shade to your home network.
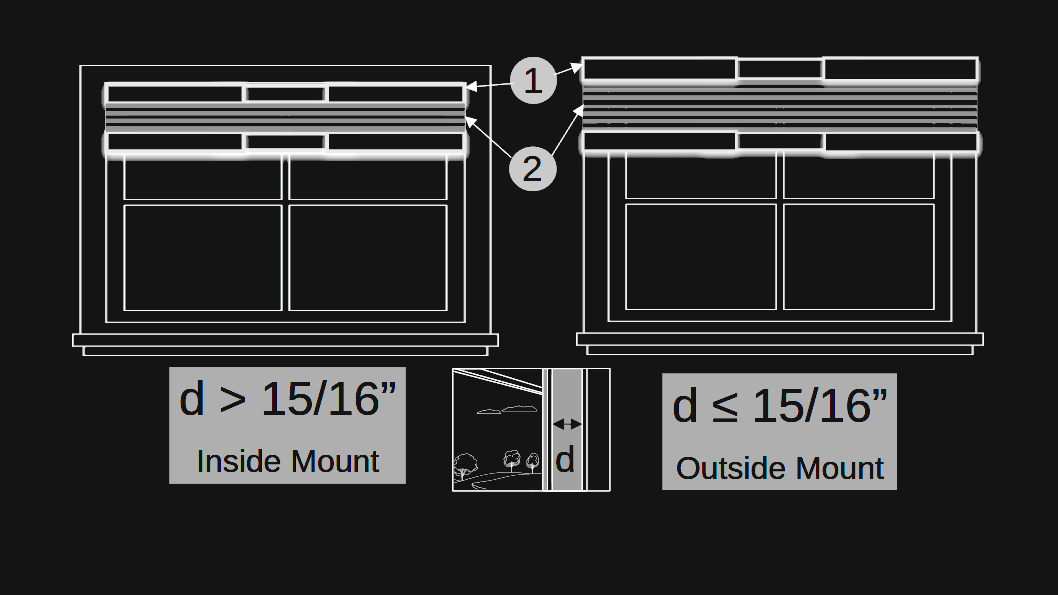
Choose Your Mounting Method
- Your window frame needs at least 15/16" of inset depth for an inside mount.
- Shallower frame, obstructions, or maximum light coverage? Go with the outside mount.
- Inside Mount: 1. Mounts inside the window frame, 2. No gaps between the fabric and the window frame.
- Outside Mount: 1. Mounts above the window frame, 2. Fabric overlaps the window frame.
Preparation checklist
Make sure your workspace is ready before unboxing:
- Clear away old blinds, brackets, or hardware.
- Clean and dry the inner window frame surface.
- Remove the support rod from the new shade clips carefully.
TrueFit™ Bar overview
Watch the full sequence, then follow each step at your own pace.
Watch how to find your fit number and anchor the TrueFit™ Bar in place.
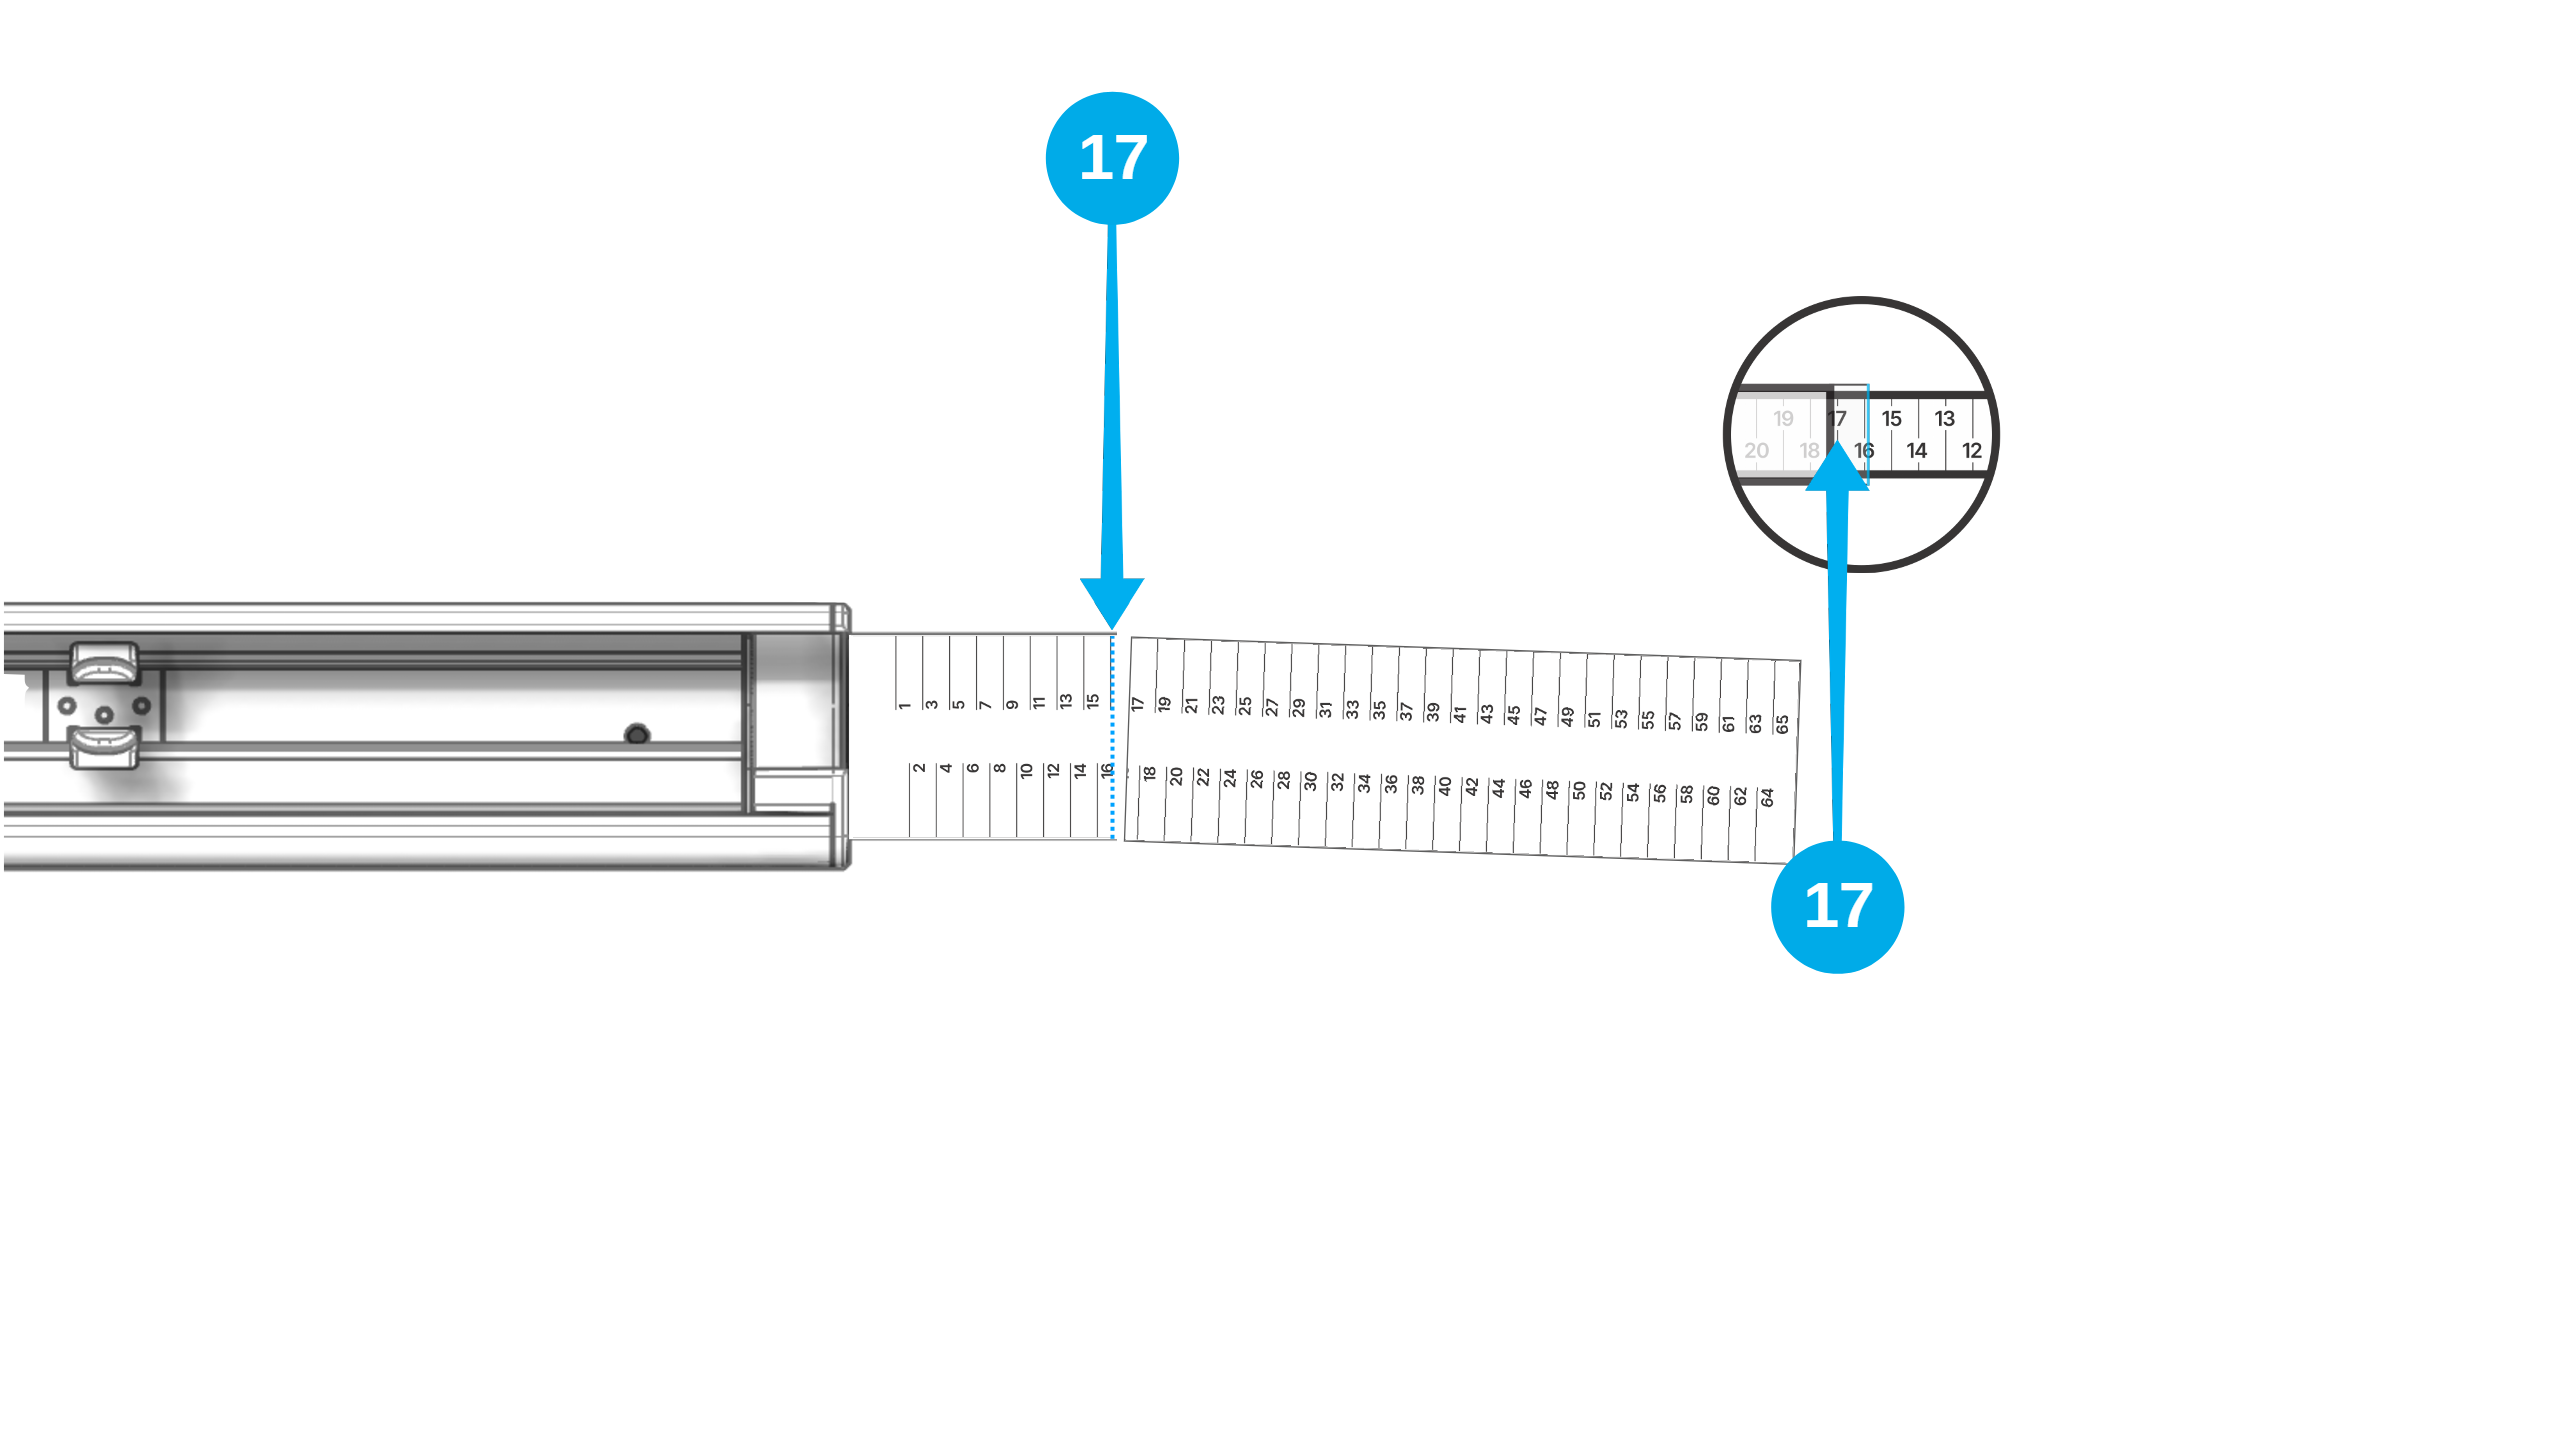
Find your Fit Number
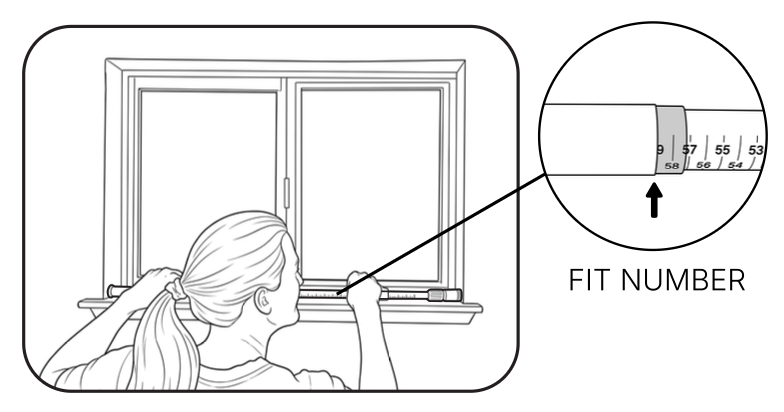
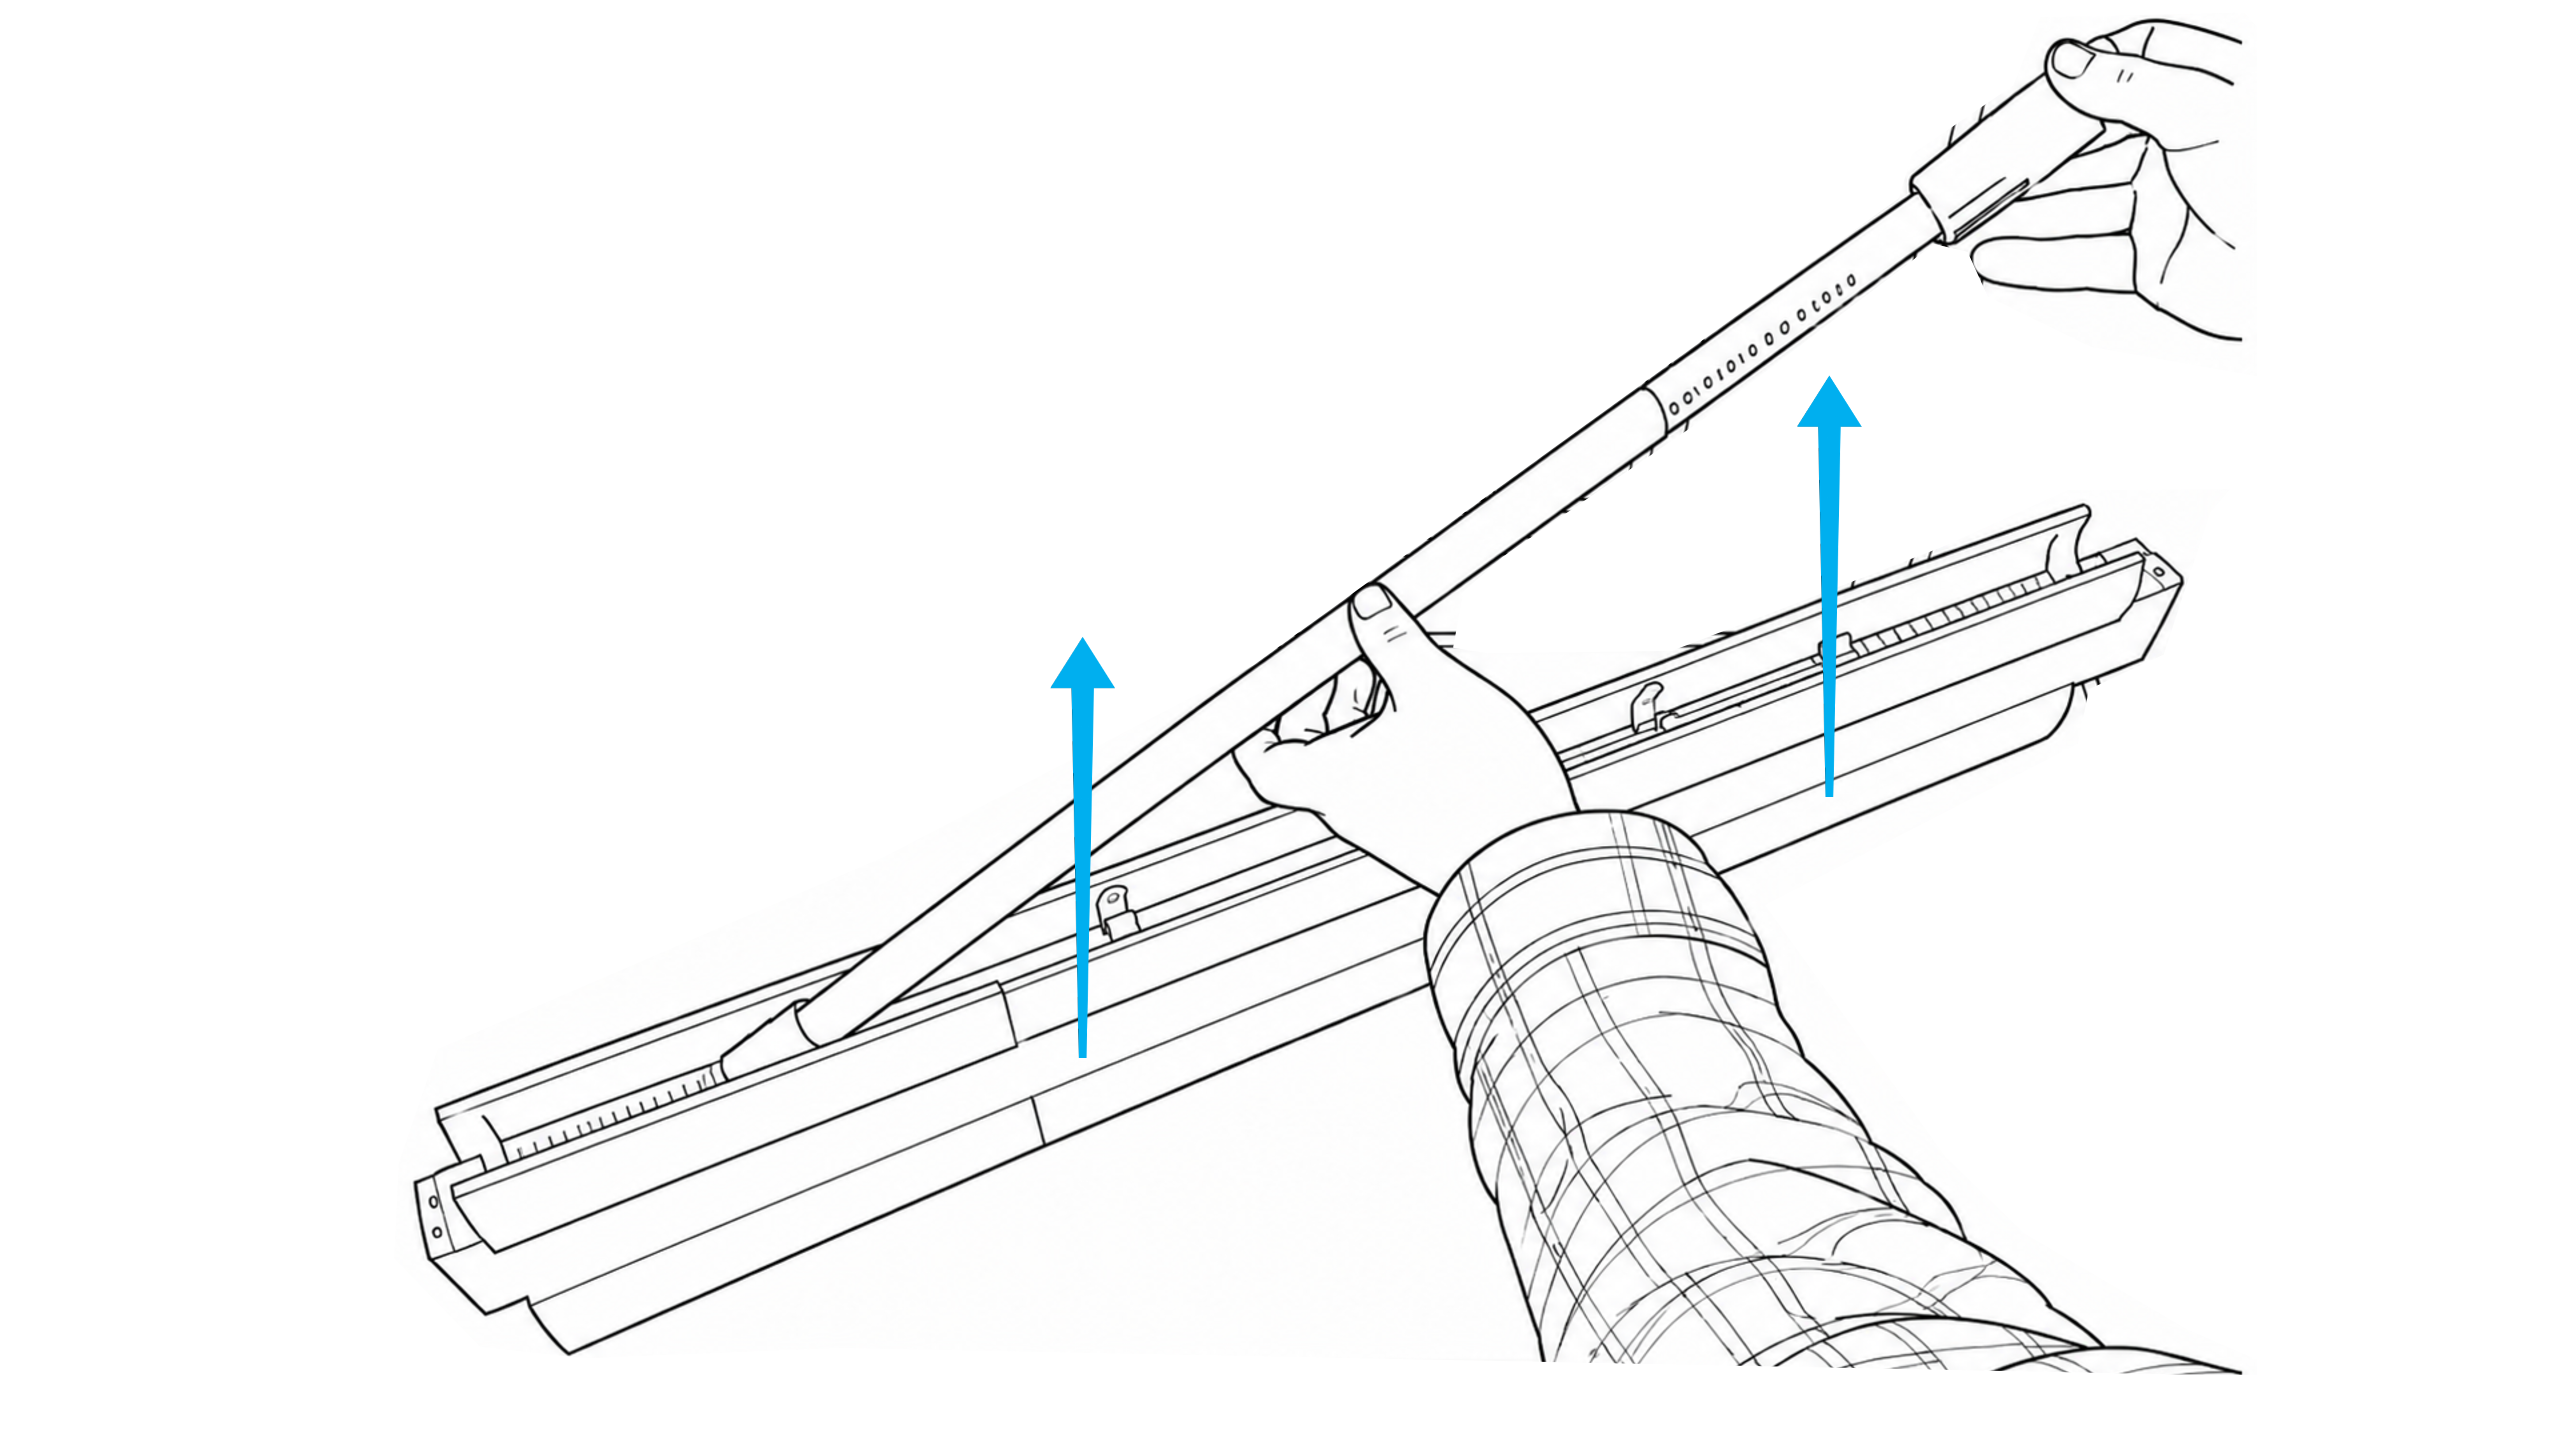
- Place the bar inside the window frame.
- Extend and twist the bar until both ends touch the frame side walls.
- Write down the number where the inner and outer rods meet.
Lock the bar to your number
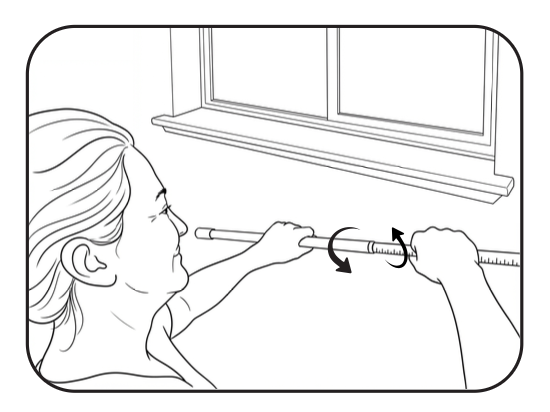
Take the bar down and twist it firmly until it locks precisely onto your fit number.
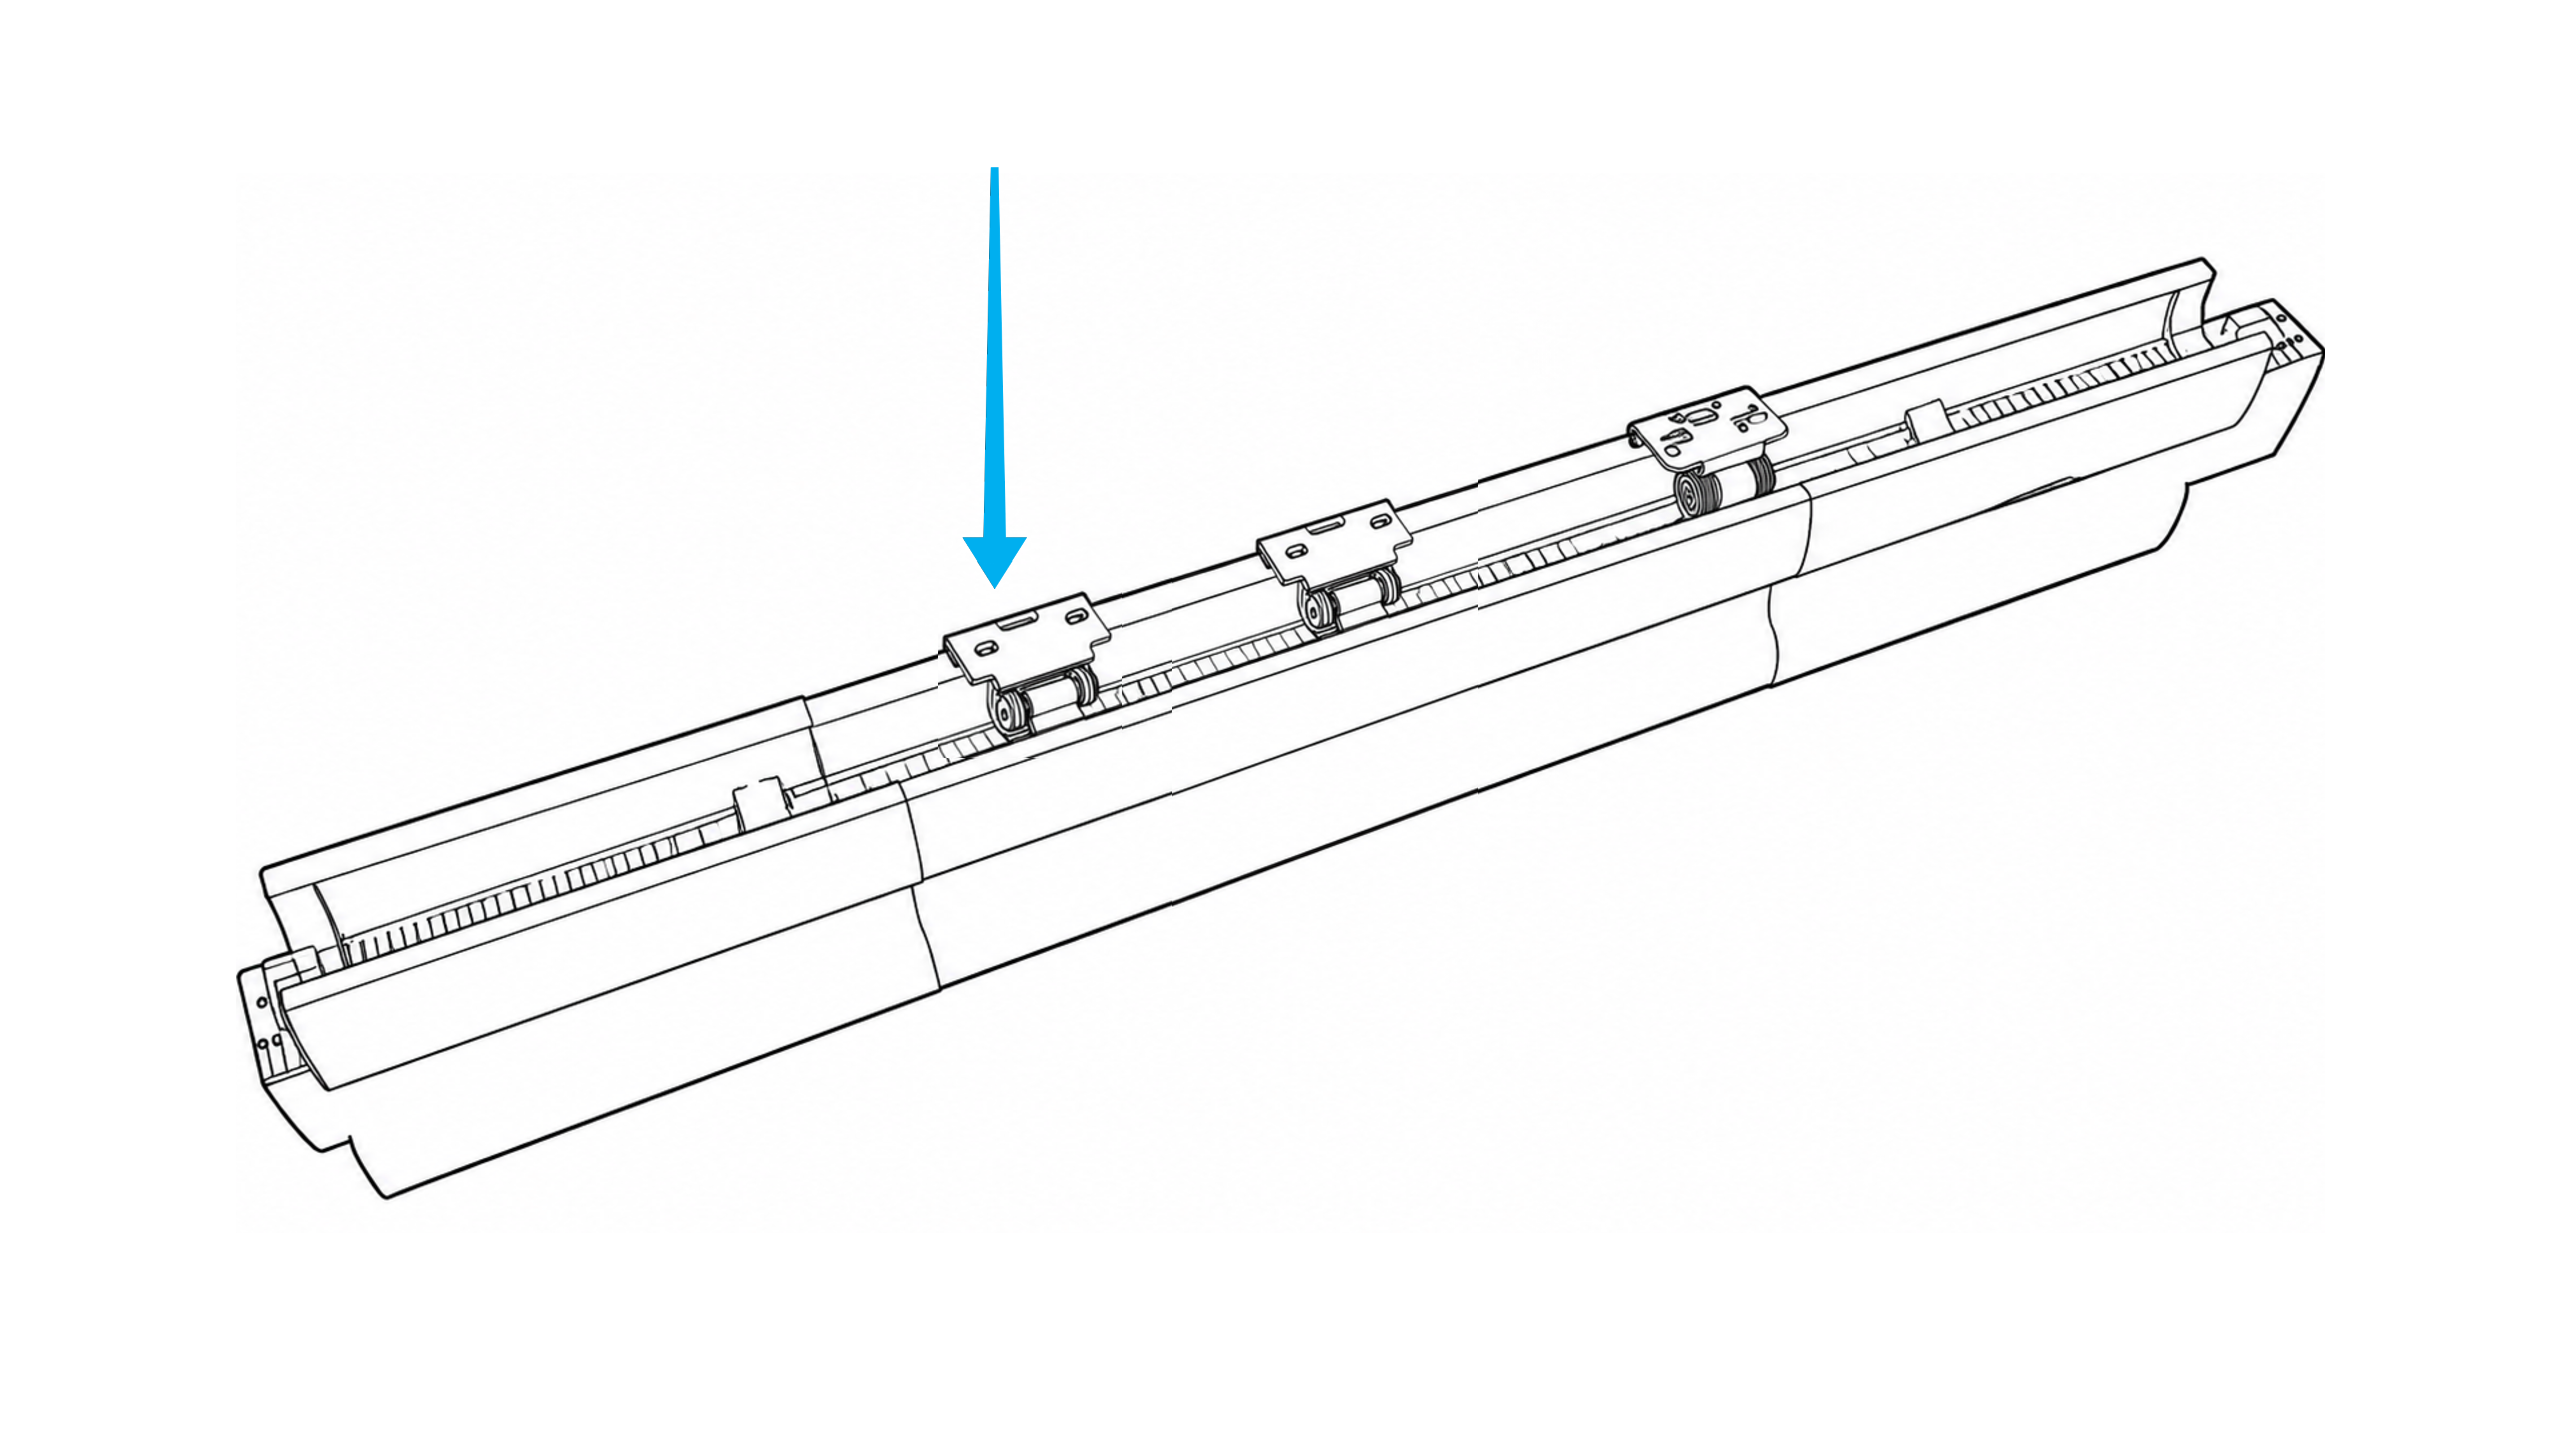
Reinstall with guides
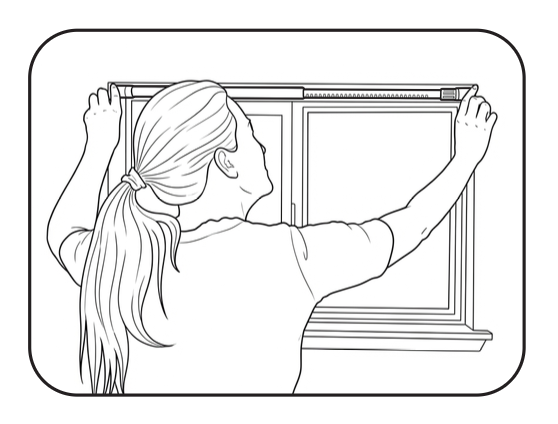
Put the bar back in the window. Snap the included mounting guides onto both ends to hold uniform clearance space for the shade body.
Check guide placement
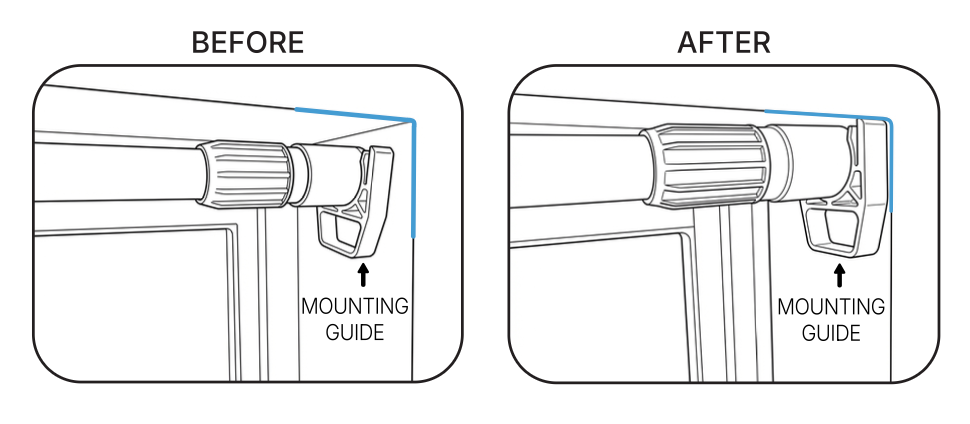
Both guides should sit flush against the frame walls on each side, creating an even gap for the shade.
Secure the TrueFit™ Bar
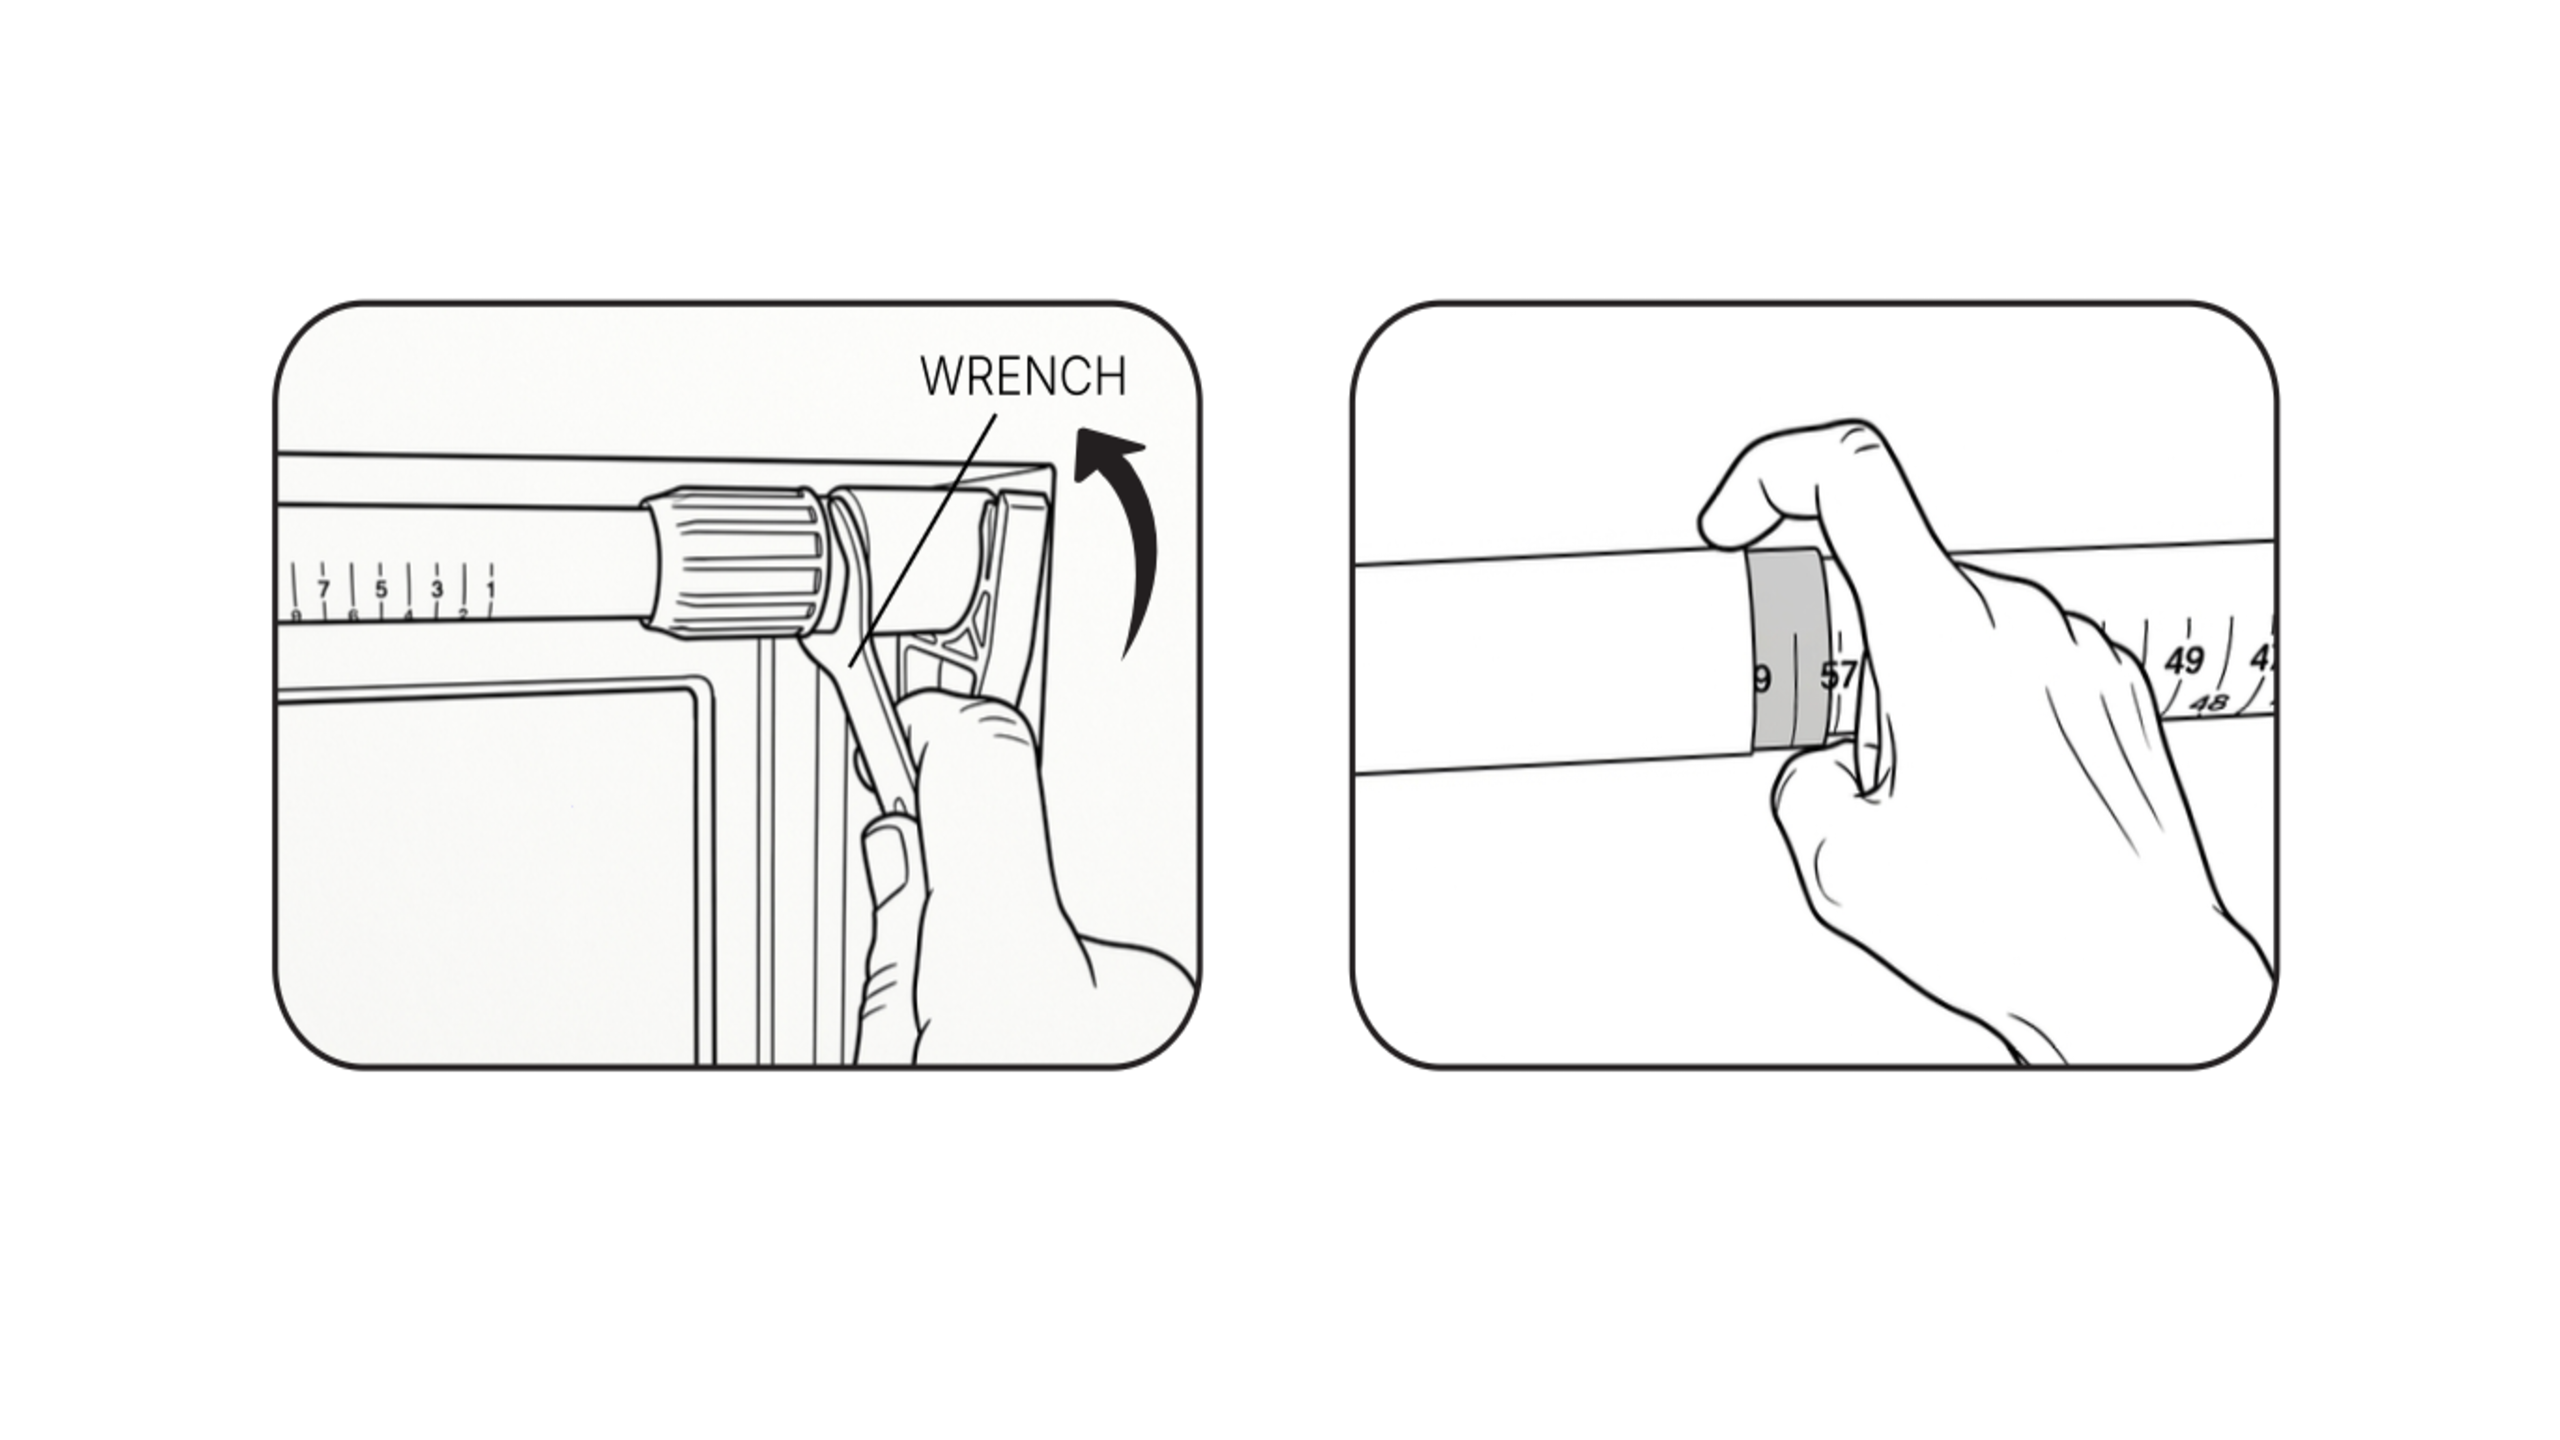
Turn the right-side end cap to anchor the bar, then use the provided wrench to tighten it firmly. Gently tug on the bar to confirm it is secure.
PerfectTrim™ Tool overview
Watch the full sequence, then follow each step at your own pace.
Watch how to cleanly trim your shade profiles to fit your window exactly.
Align the blade
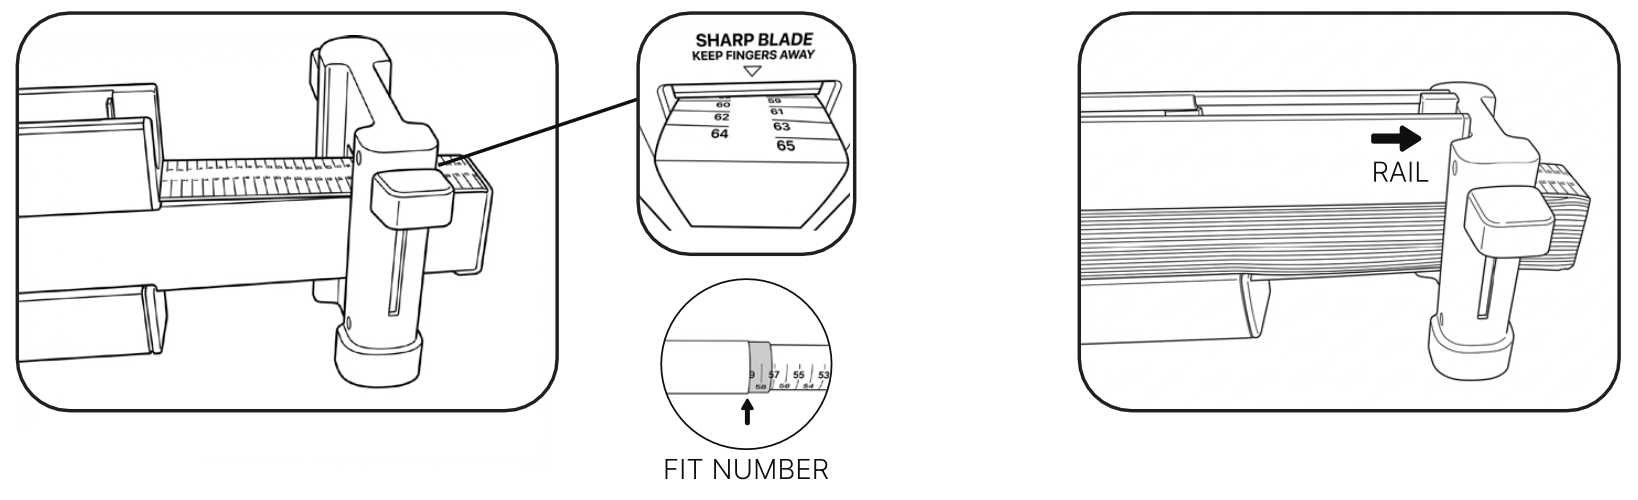
- Align the blade tool precisely on top of your fit number.
- Apply steady down-pressure using your body weight.
Trim both sides
Trim side one, then repeat the exact same process on side two using the same fit number.
Snap the shade into place

Pull off the plastic mounting guides. Push the shade body up into the TrueFit™ Bar until it clicks home.
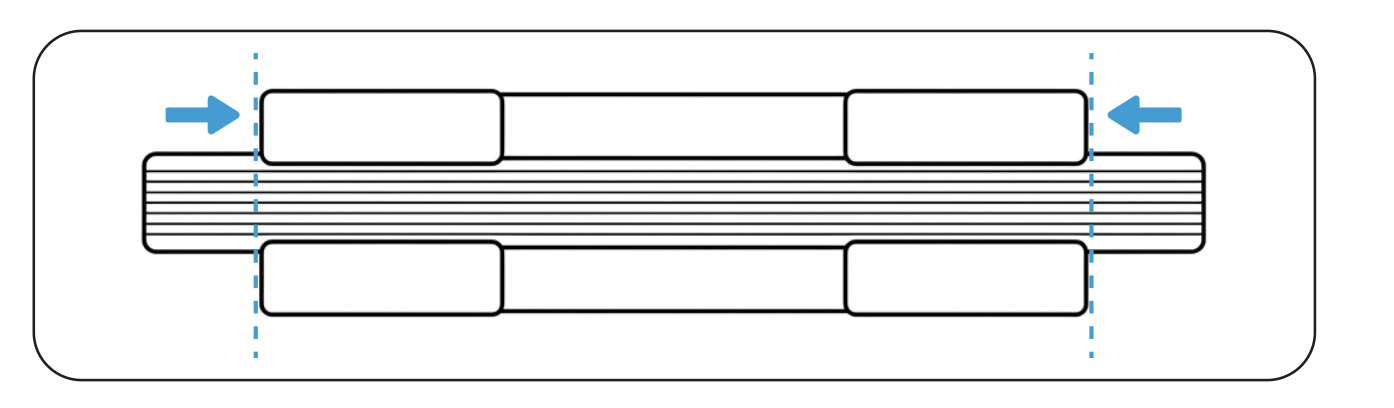
Extend the side rails
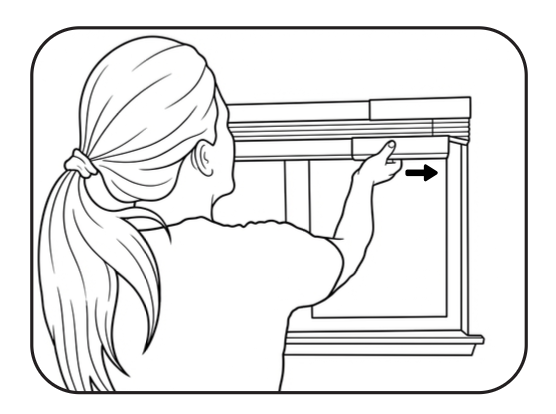
Slide the edge rails straight outward on both the left and right sides to completely seal light gaps.
Remote and travel limits overview
Watch the full sequence, then follow each step at your own pace.
Watch how to pair your remote with your shade and set the upper and lower travel limits.
Pair your remote
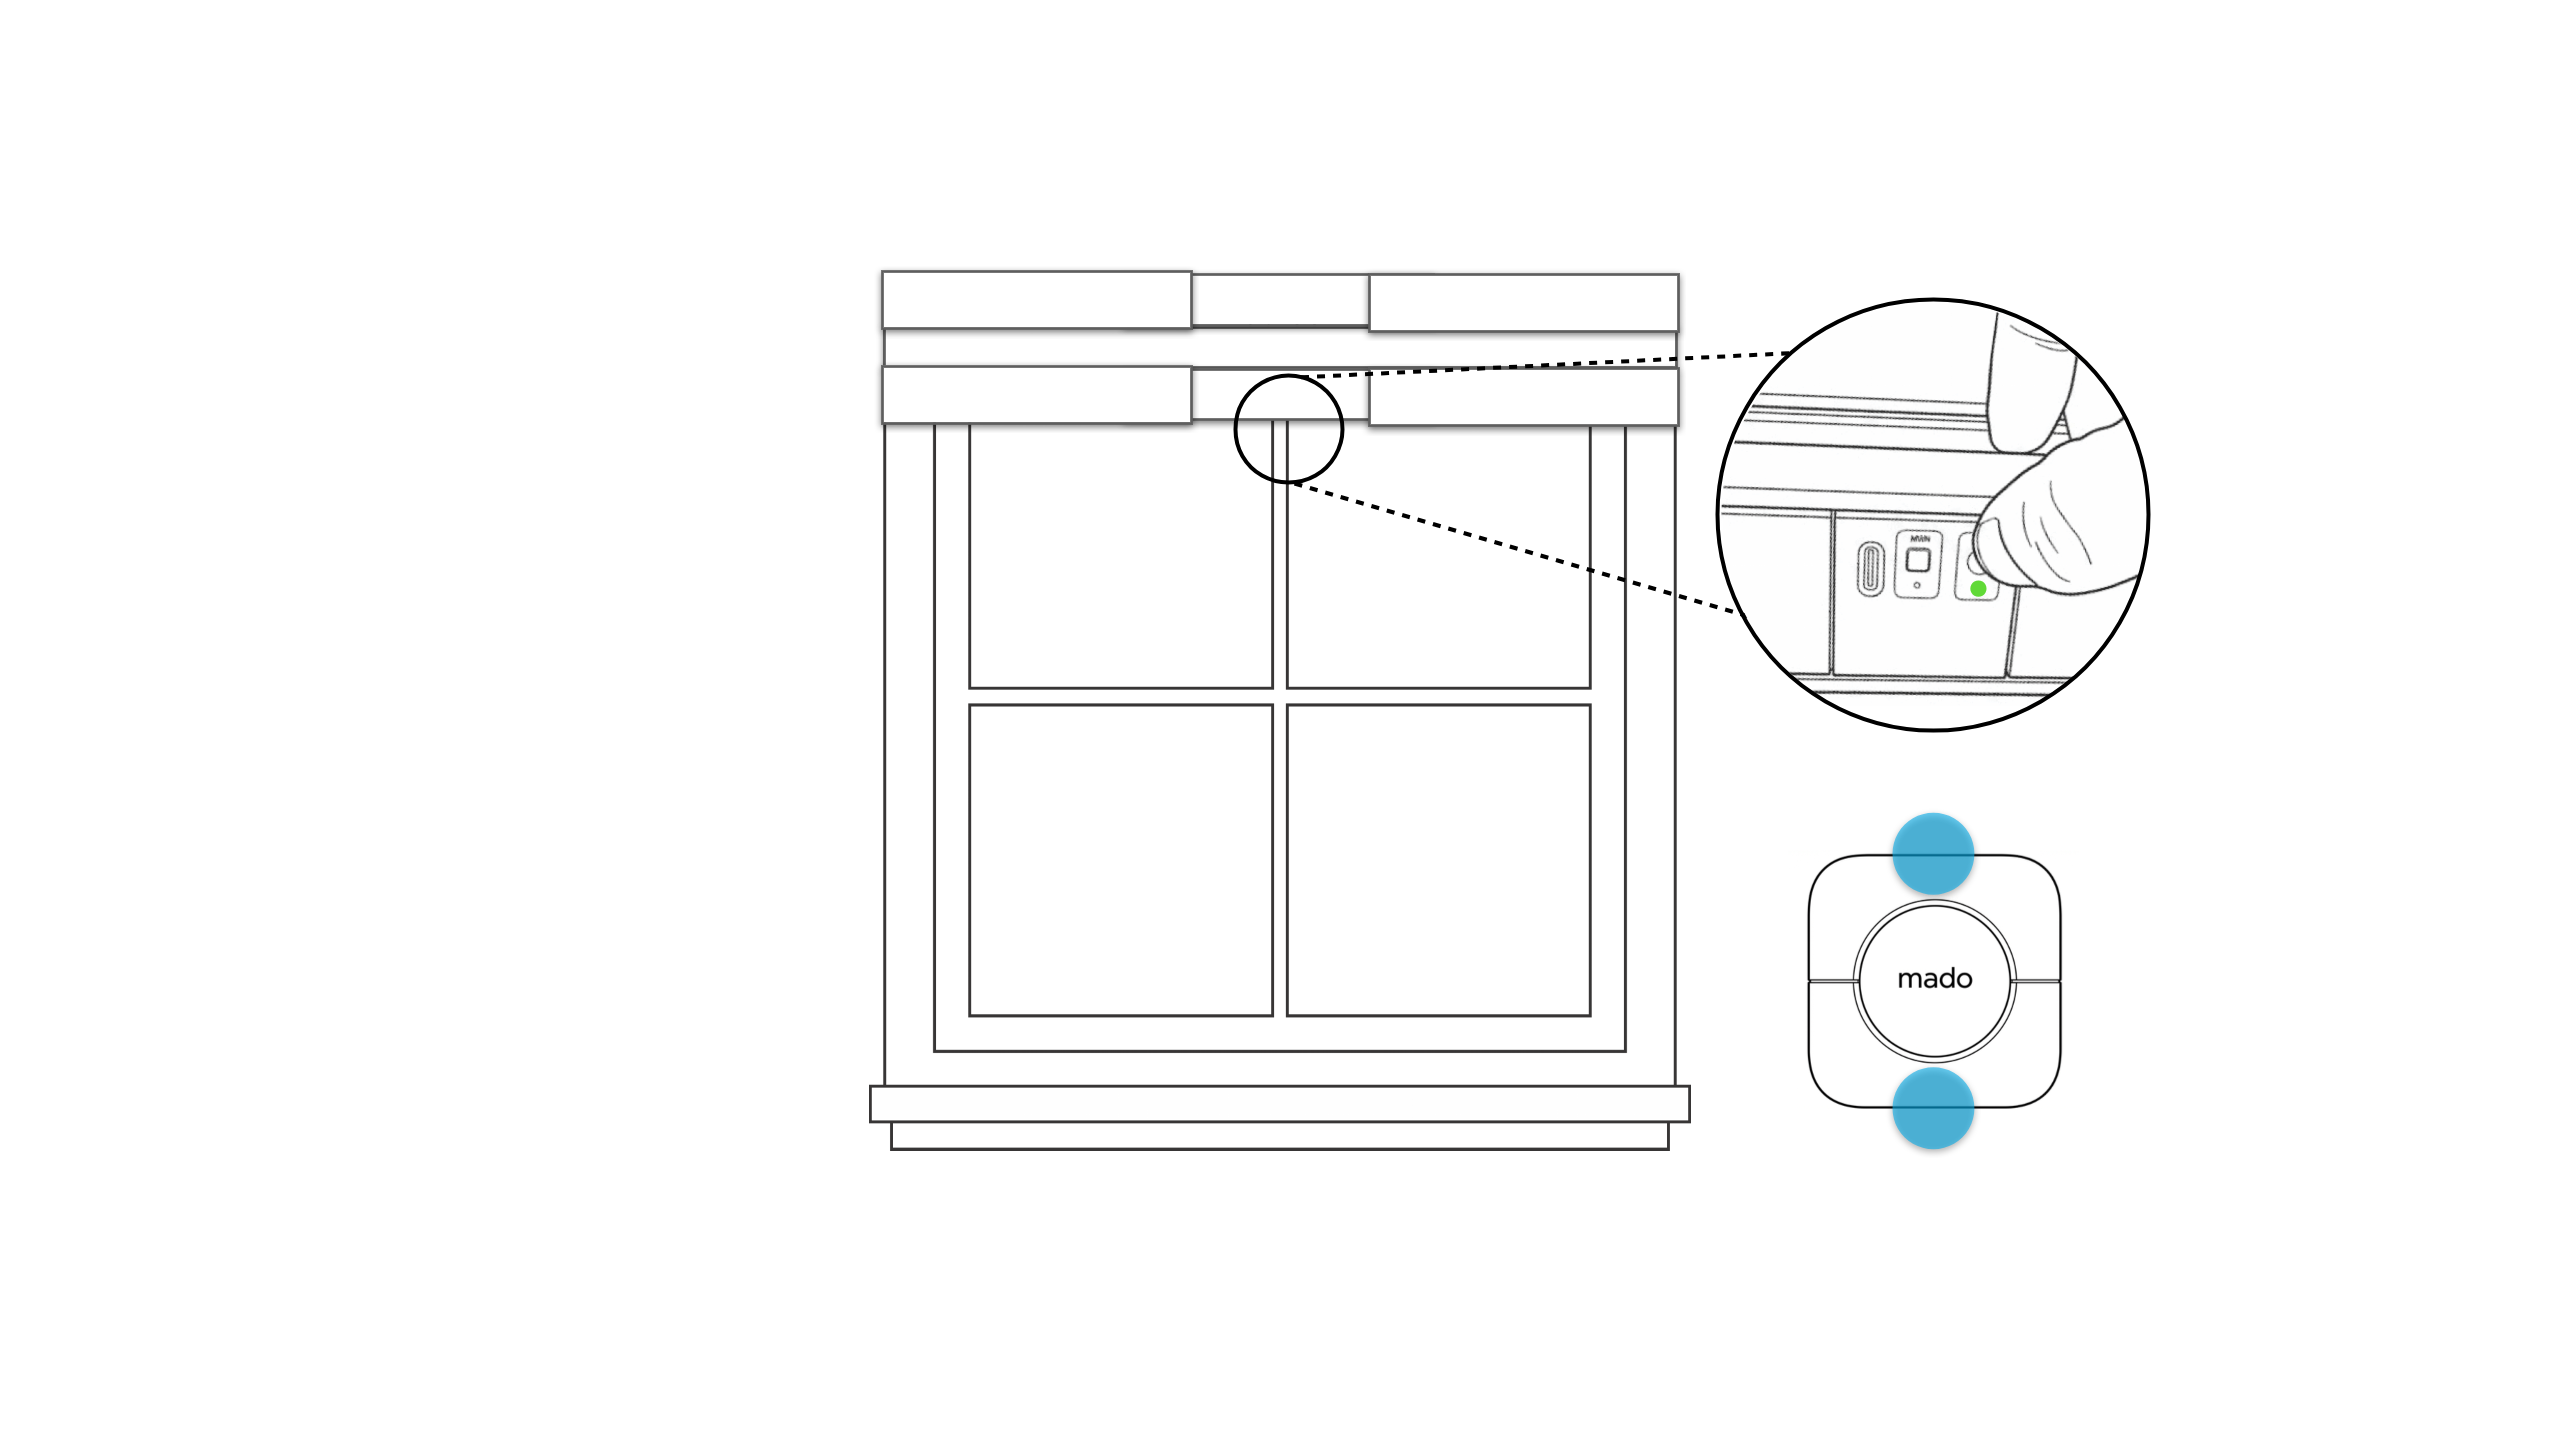
- Hold the motor's PROG button for 4 seconds until the green light stays solid.
- Hold Up + Down together on the remote until the shade jogs.
Preparation checklist
Take a few minutes to prepare before unboxing:
- Clear away any old window coverings, brackets, or hardware.
- Make sure the wall or trim surface above the window is clean and dry.
Gather your tools
- Included mounting brackets and screws
- Included PerfectTrim™ Tool
- Power drill or screwdriver
- Pencil
- Stable ladder or step stool
Overview: Sizing and trimming
Watch the full sequence, then follow each step at your own pace.
You'll remove the TrueFit™ Bar, measure your exact window width, and trim both sides of the shade to fit.
Remove the TrueFit™ Bar
Gently slide the TrueFit™ Bar completely out of the shade housing.
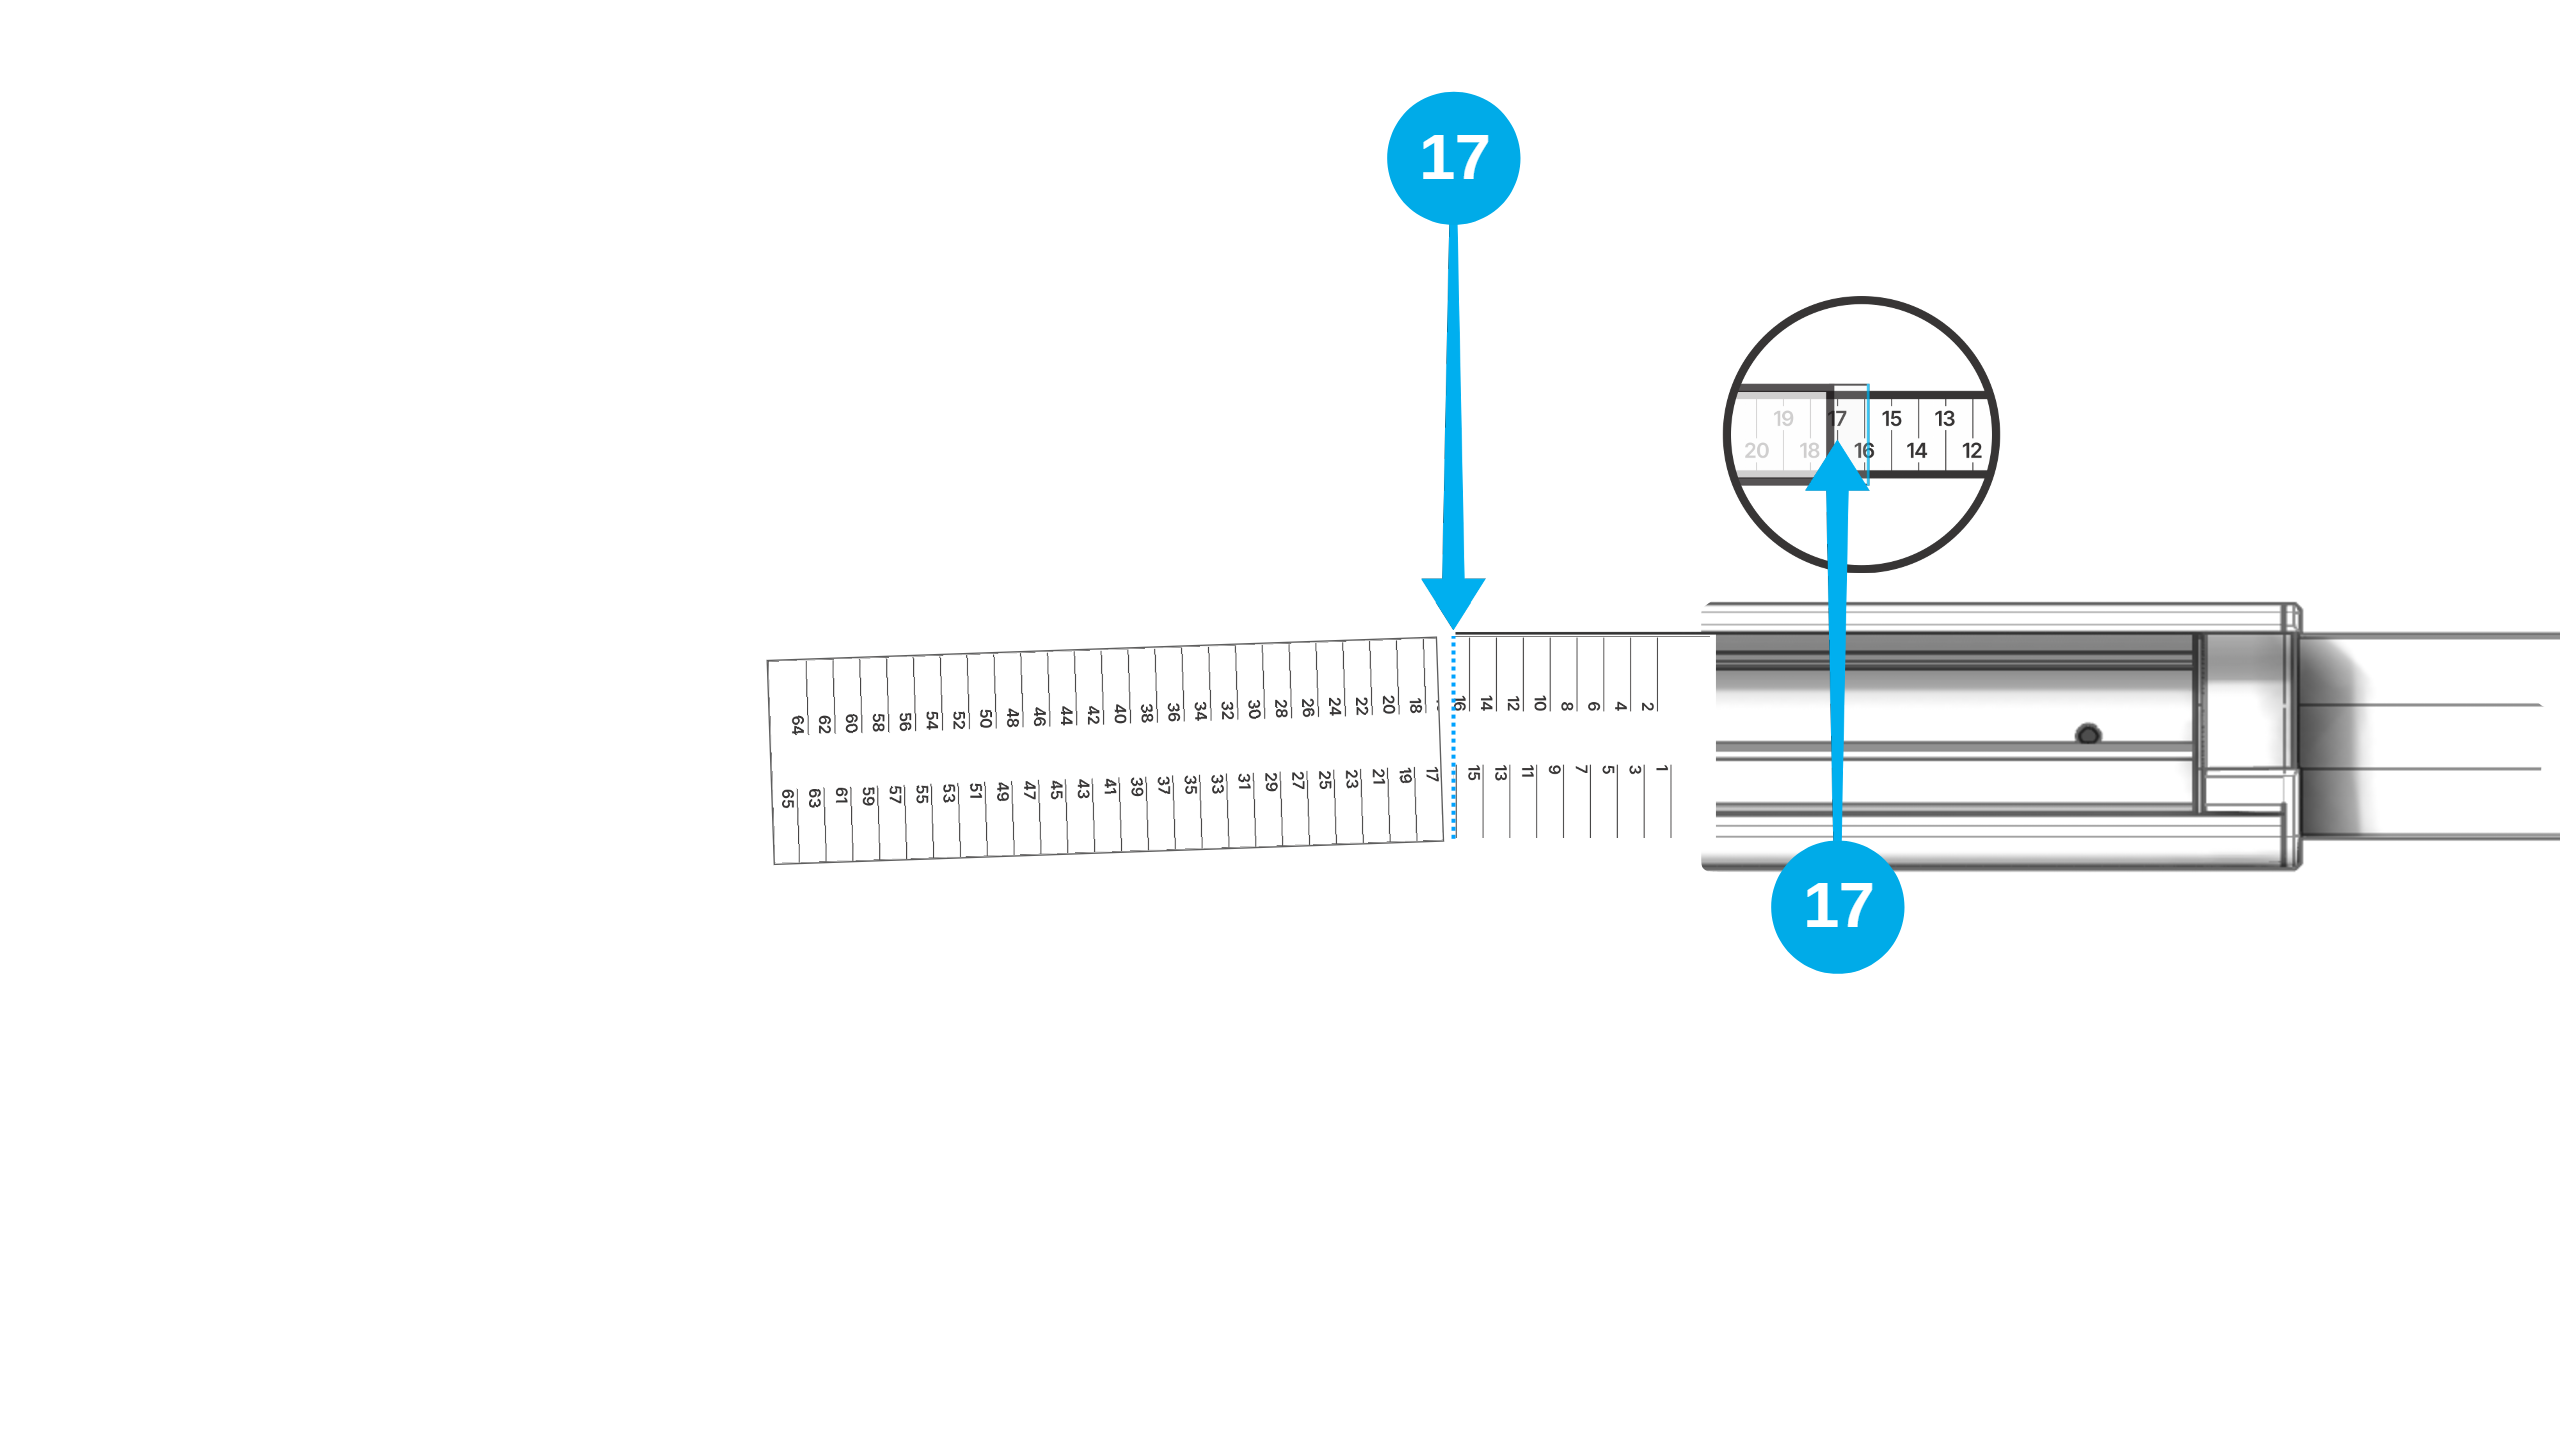
Read your Fit Number
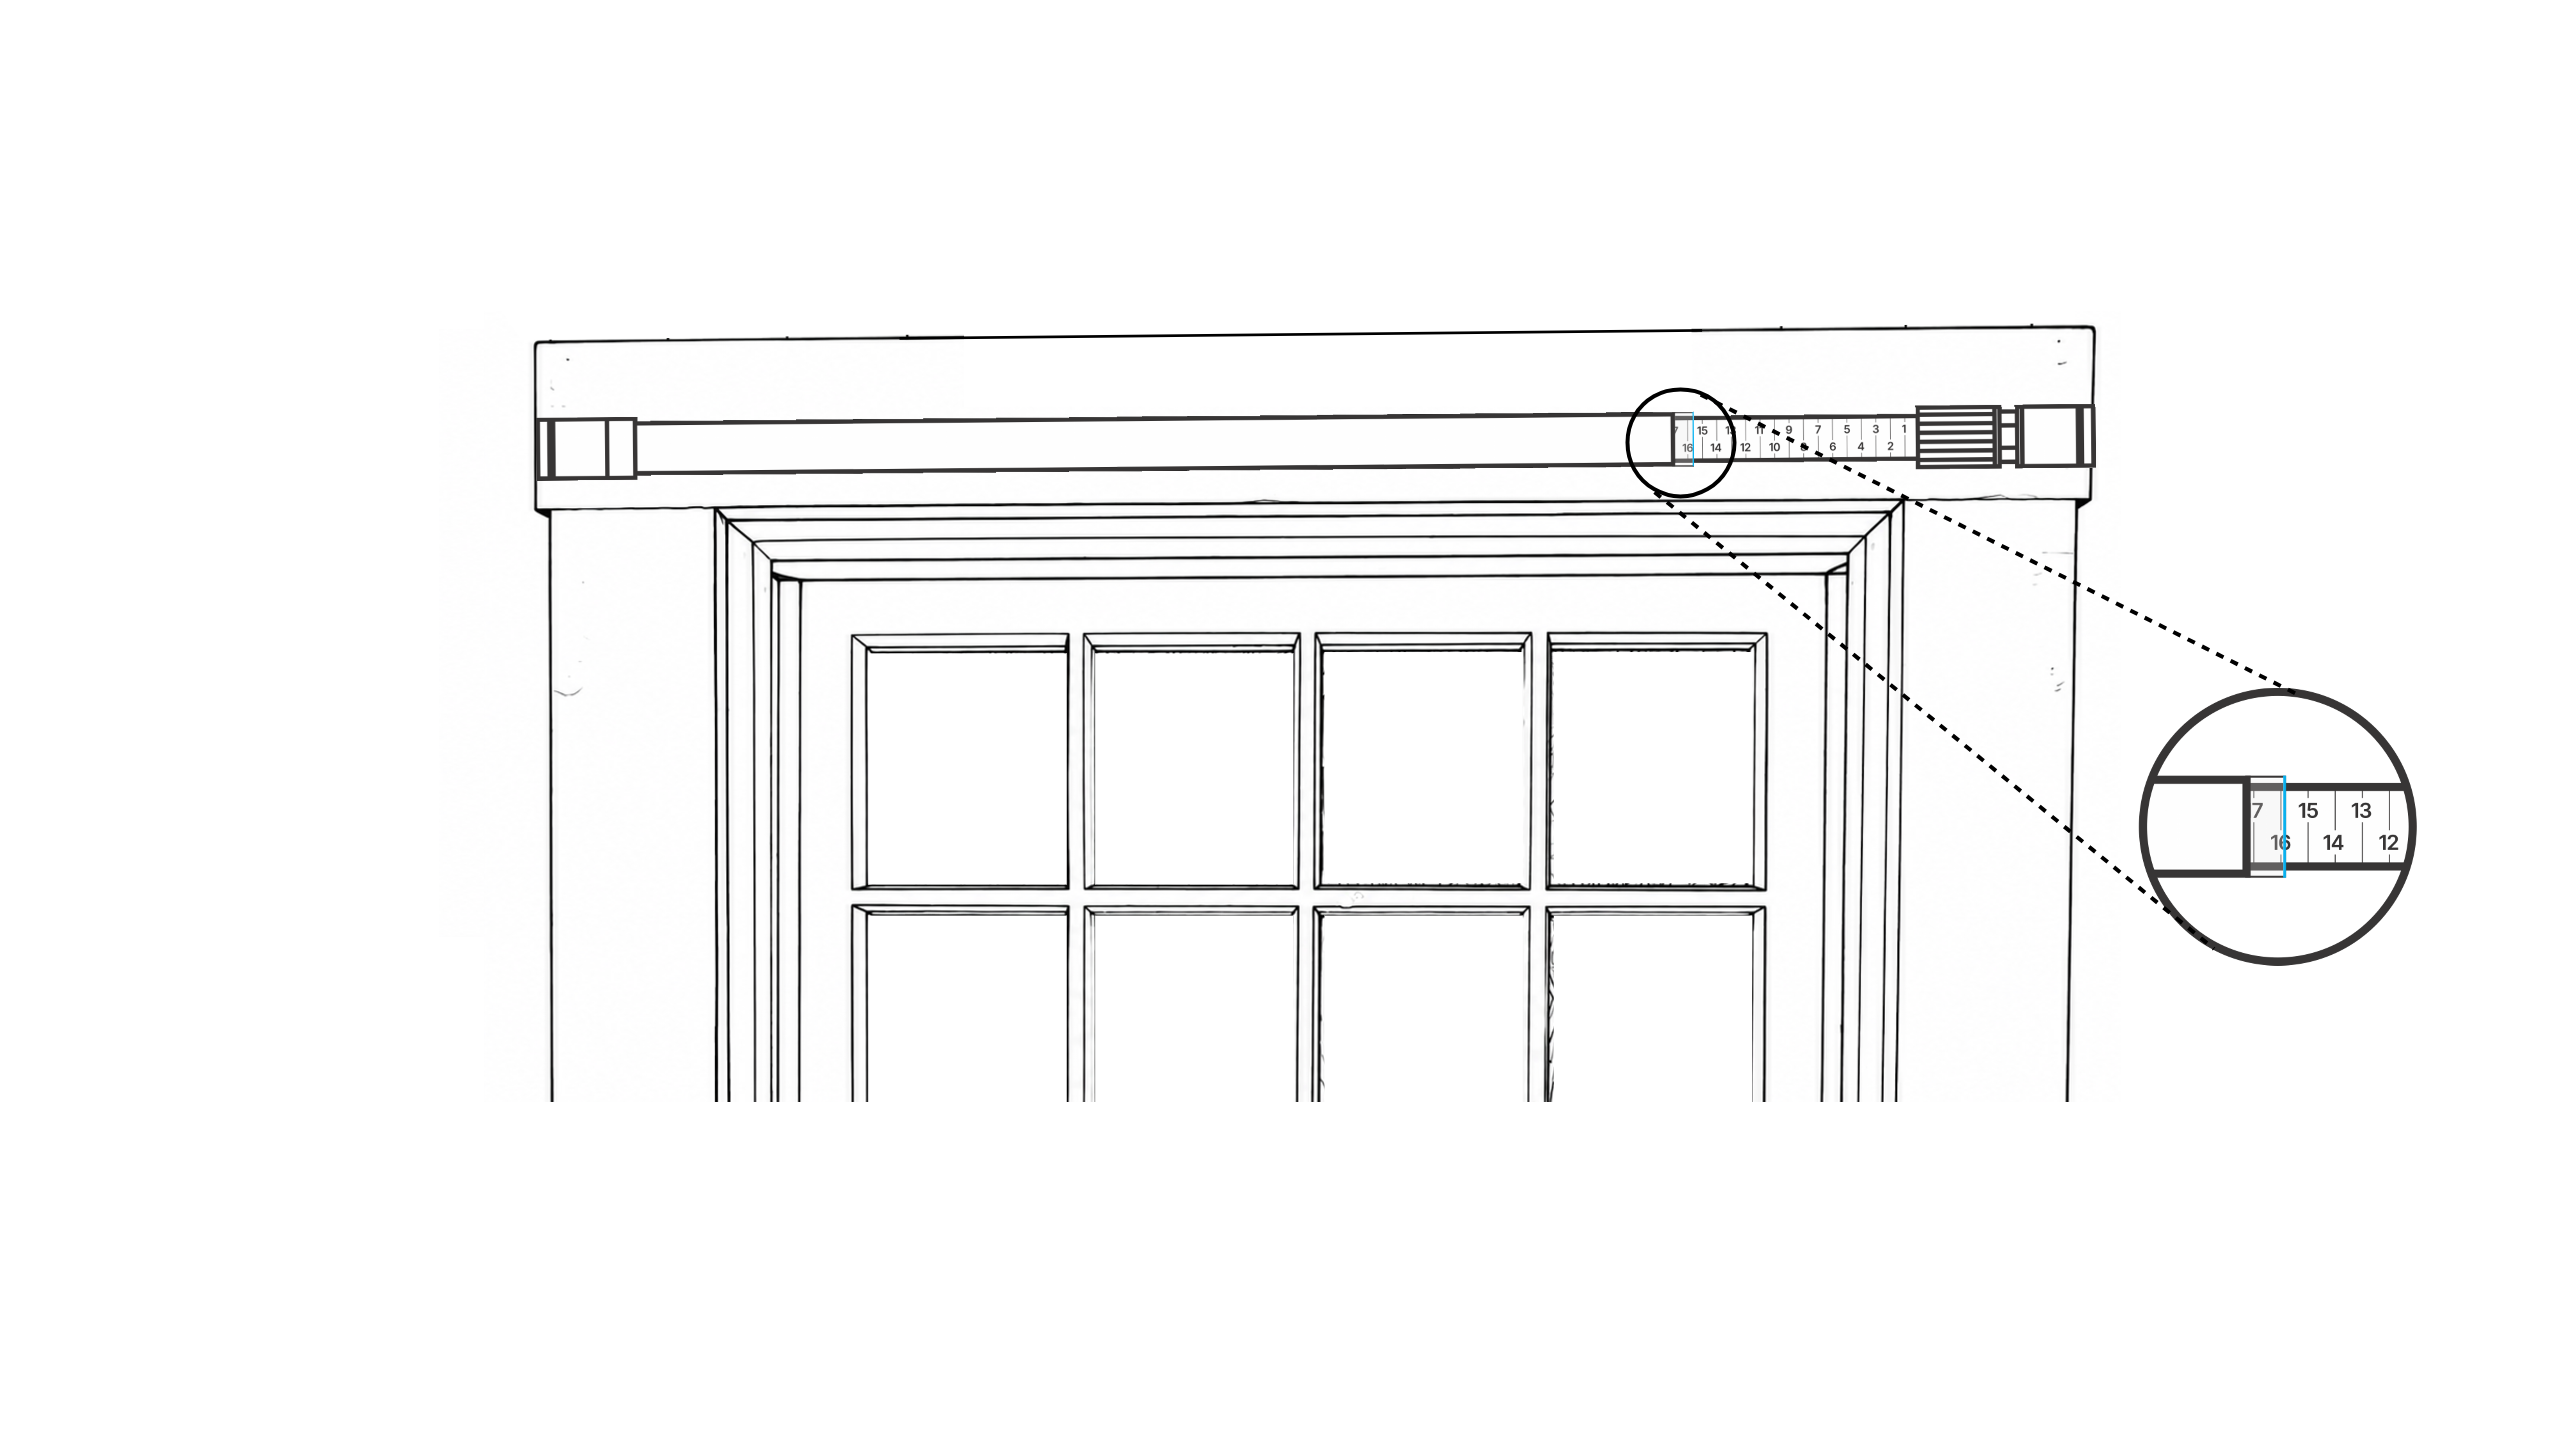
Extend the TrueFit™ Bar across the full outside width of your window frame you want the shade to cover.
Note your Fit Number — look at the indicator line where the inner and outer rods meet. Write it down.
Trim side one
- Align the PerfectTrim™ Tool blade precisely on your Fit Number.
- Apply steady, firm down-pressure to slice cleanly through the side profile.
Trim side two
Repeat the exact same process on the opposite side of the shade using the same Fit Number.
Overview: Bracket layout
Watch the full sequence, then follow each step at your own pace.
You'll snap brackets onto the shade, hold it up to mark the wall, then mark the exact screw holes for drilling.
Snap brackets onto the shade
Before holding the assembly up to the wall, snap the mounting brackets directly onto the clips on the back of your shade.
| Shade Size | Brackets Needed |
|---|---|
| Small / Medium | 3 brackets |
| Large / X-Large | 5 brackets |
Mark bracket locations
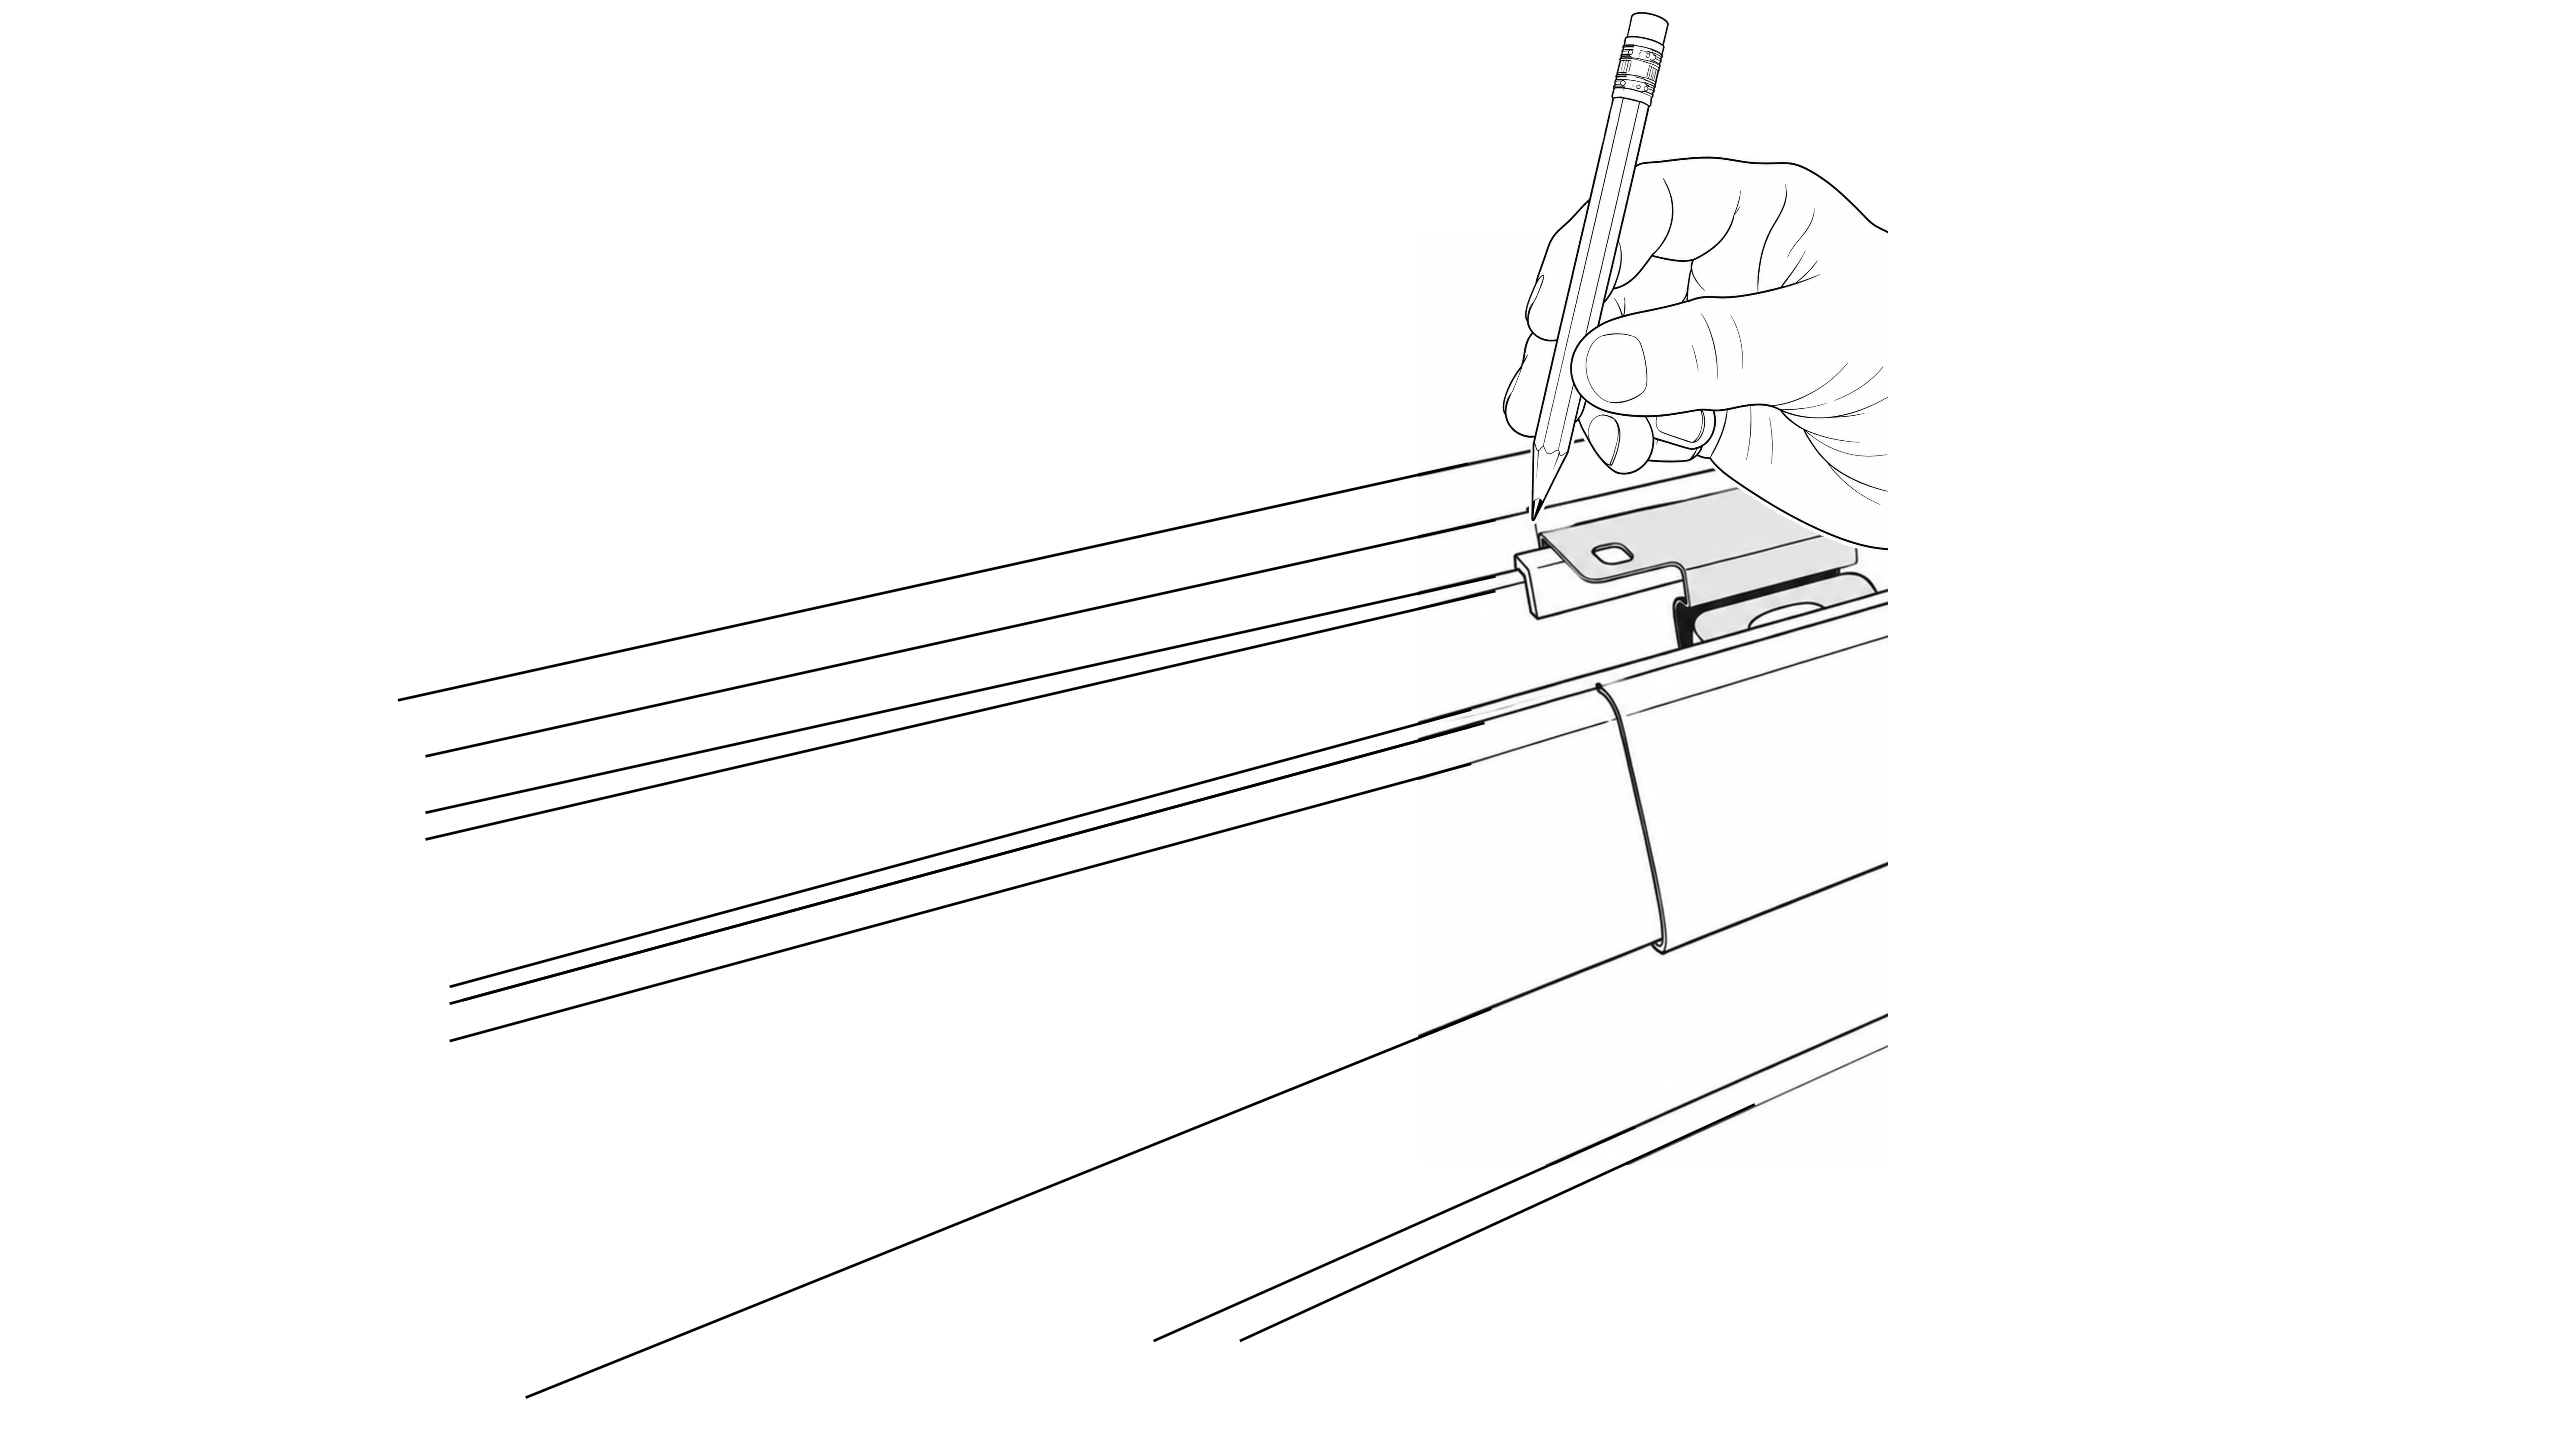
- Step up on your ladder and hold the fully assembled shade centered above the window at exactly the height you want.
- Use a pencil to mark the outer edge of each bracket against the wall or trim.
Mark the screw holes
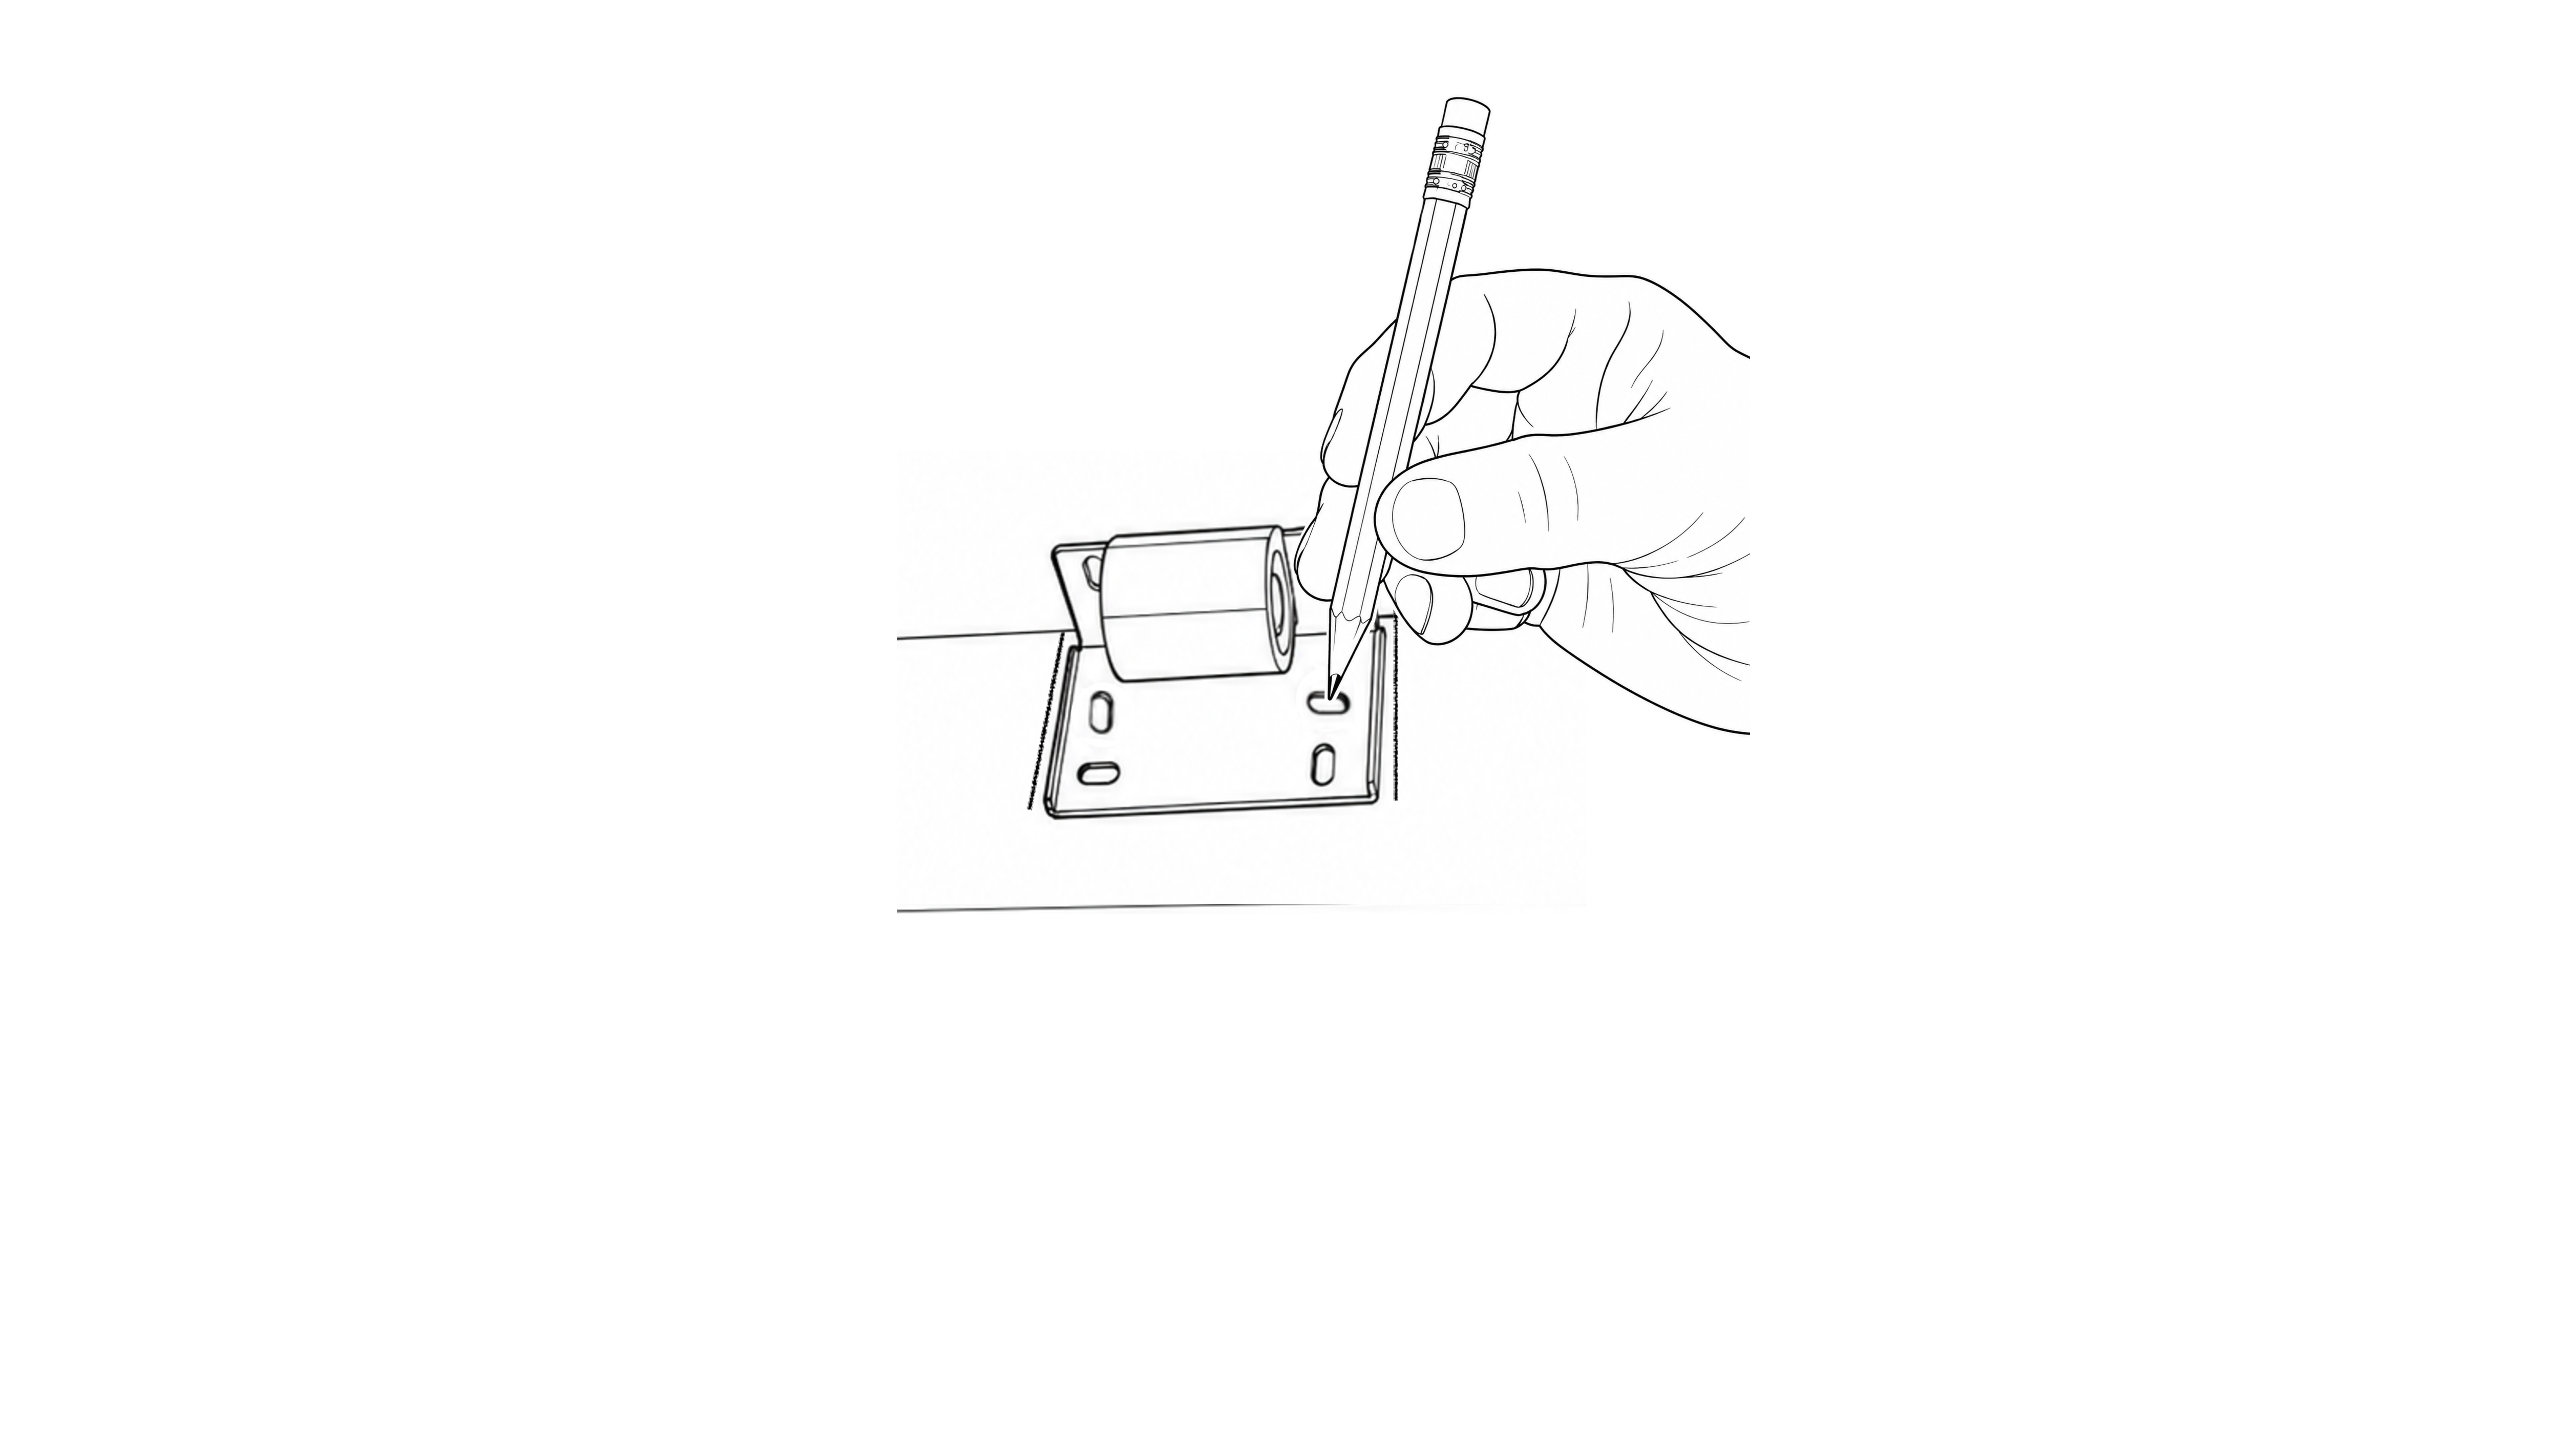
- Take the shade down and unclip the brackets from the shade body.
- Hold each individual bracket back up to your pencil marks.
- Mark the exact placement of each screw hole with your pencil.
Overview: Mounting and programming
Watch the full sequence, then follow each step at your own pace.
You'll drill, mount the brackets, snap the shade in, pair the remote, and set your travel limits.
Drill pilot holes

Using your power drill, carefully drill small pilot holes at each pencil-marked screw hole location.
Mount the brackets
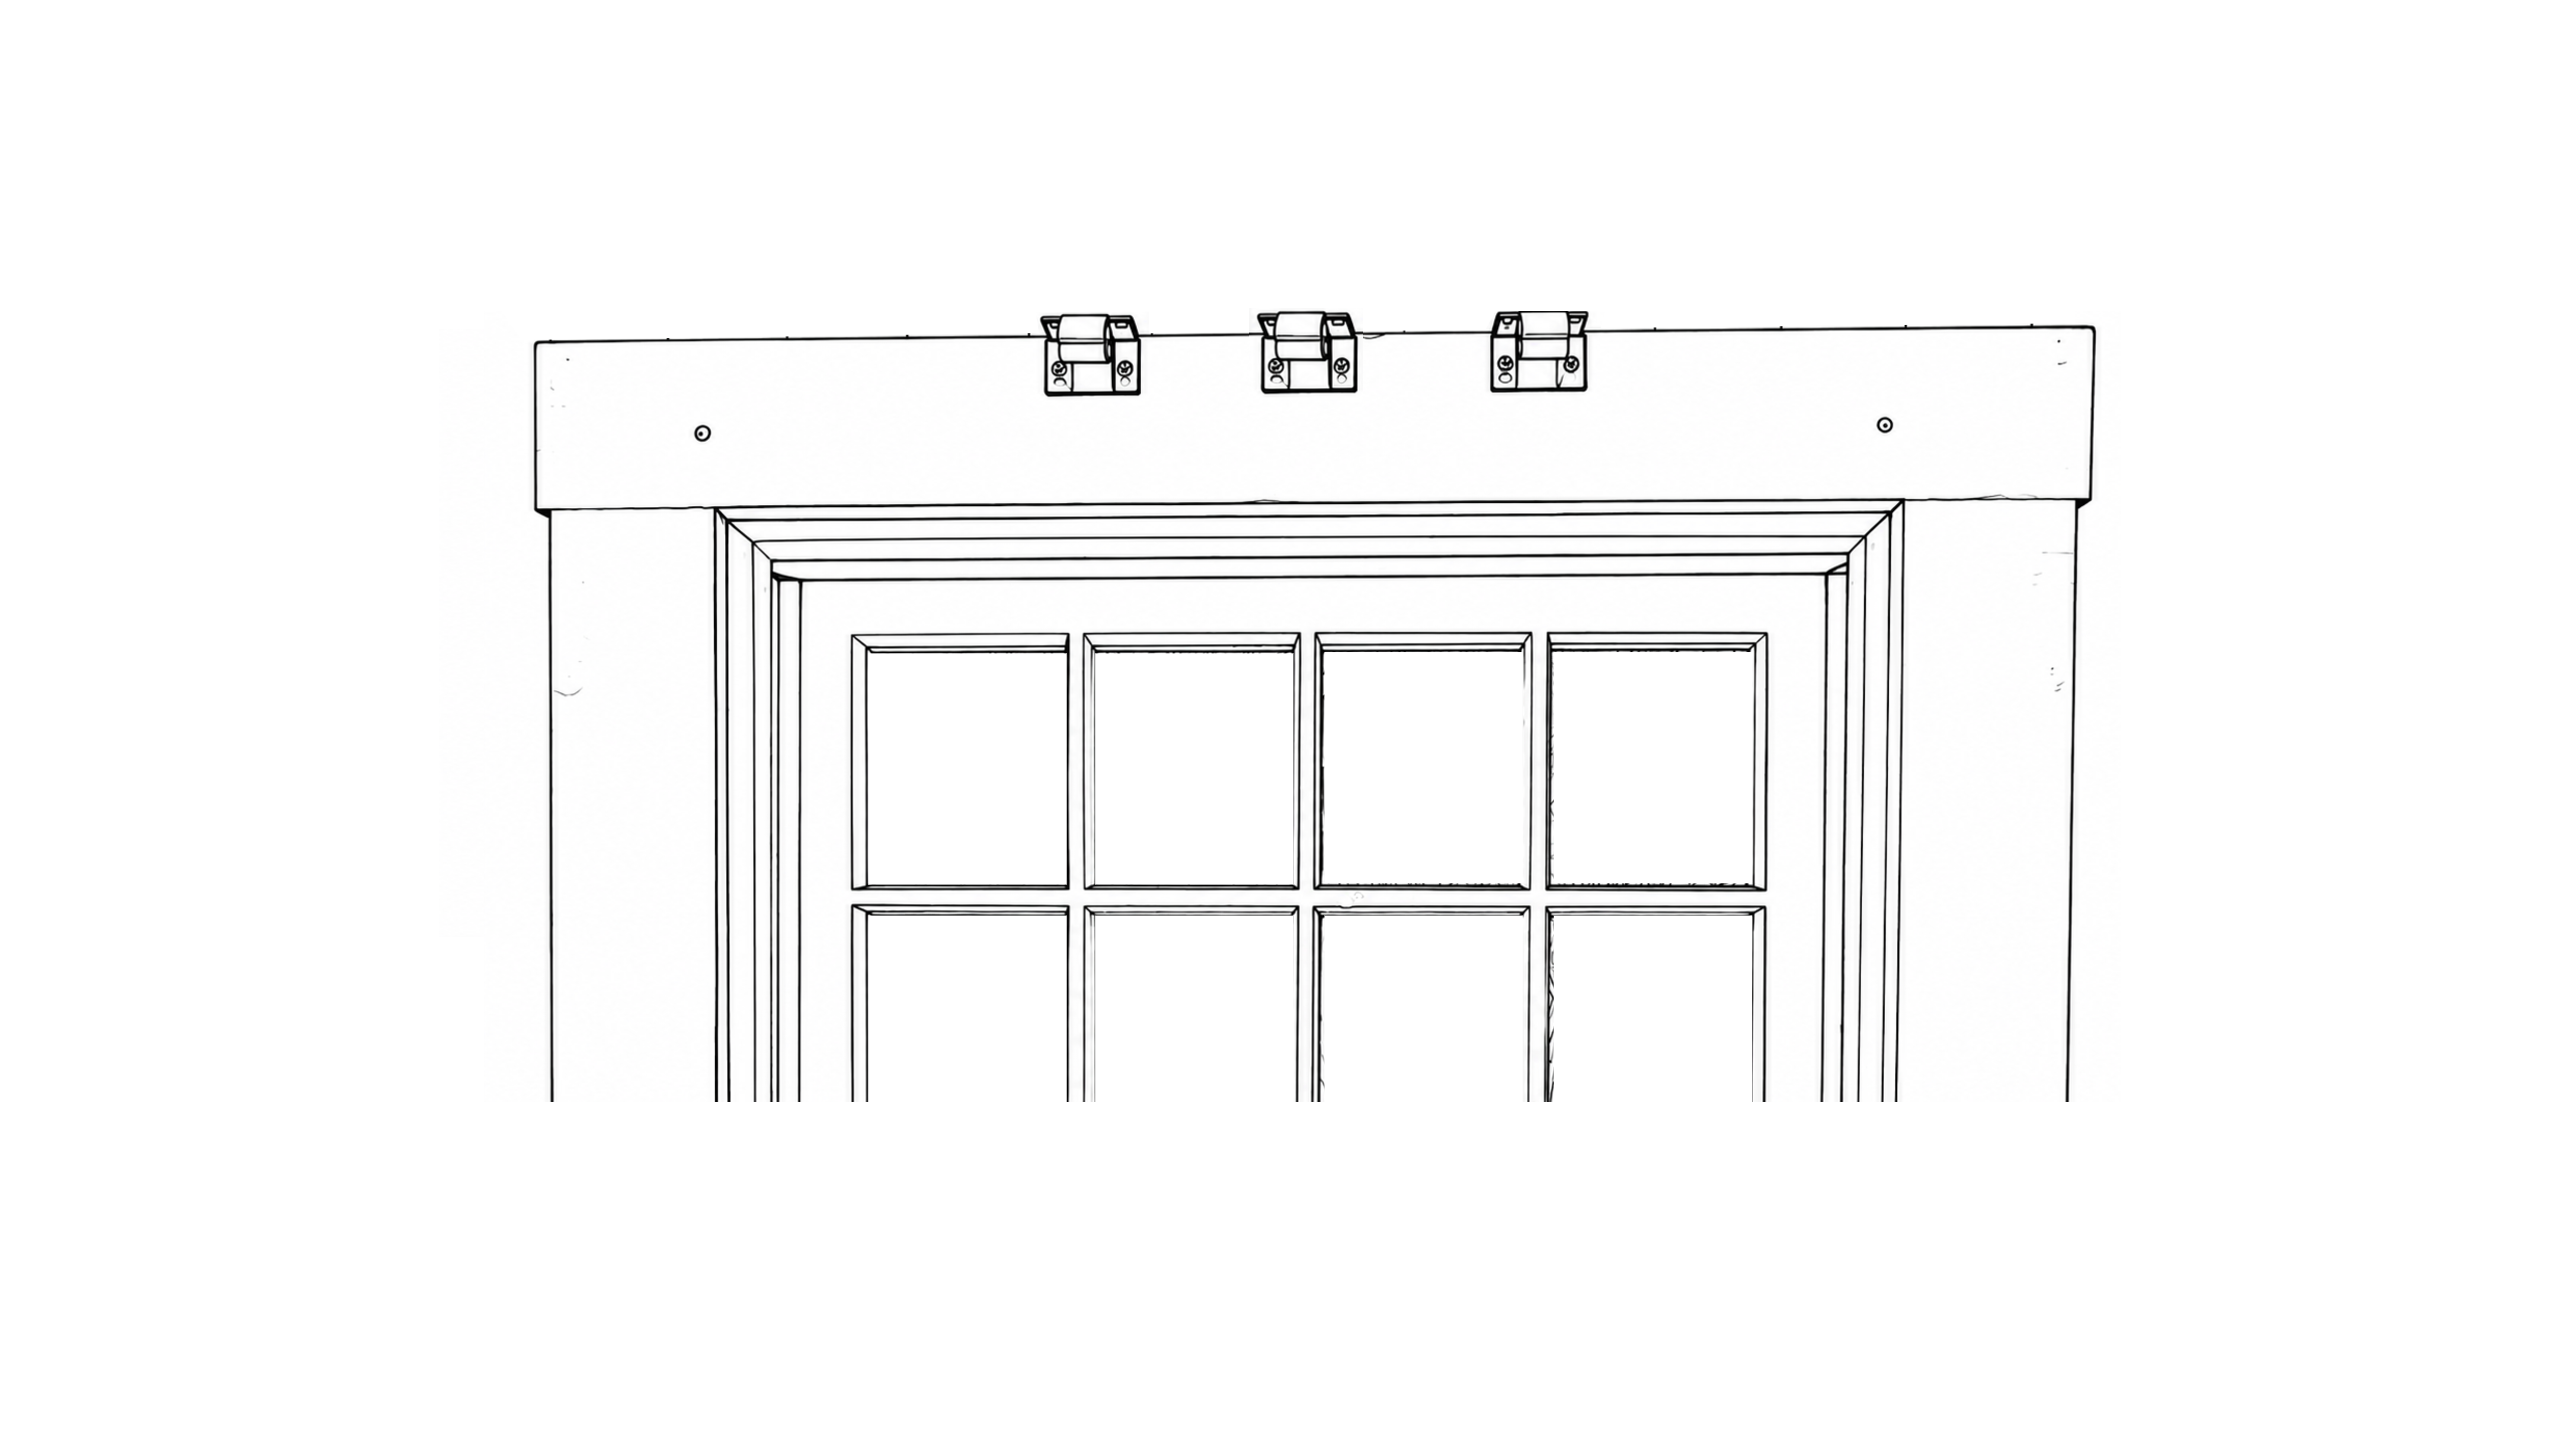
- Line up each bracket over its pilot holes.
- Drive the included screws in firmly.
Snap the shade into the brackets
Lift the shade body up and press it firmly into the mounted brackets.
Push until you hear each bracket click and lock into position.
Pair your remote
- Pull the battery tab from the remote's back plate.
- Hold the motor's PROG button for 4 seconds until the green light stays solid.
- Hold Up + Down together on the remote until the shade jogs.
Set your travel limits
- Use the Down button to unroll the shade to the desired lower position.
- Hold Center + Down together until the shade jogs — lower limit locked.
Your shade is installed!
Set your travel limits
- Use the Down button to unroll the shade to the desired lower position.
- Hold Center + Down together until the shade jogs — lower limit is now locked.
How your remote works

- Center Button (Toggle Control): Works like a standard garage door opener.
- Press once to lower the shade.
- Press again to stop the shade.
- Press once more to raise the shade.
- Up / Down Buttons: Press anytime to immediately move the shade in that specific direction.
Hold on before you pull! 🛠️
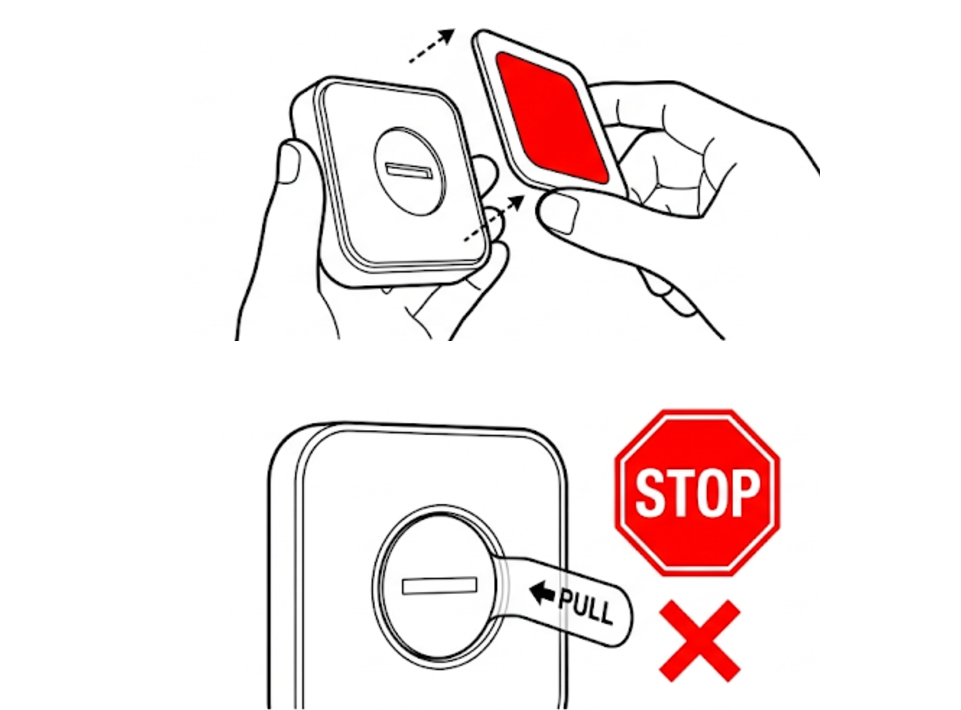
Activate your remote
- Remove the magnetic back mount. Caution: Do NOT pull the tab marked PULL!
- Remove the battery door using the included wrench as a tool.
- Remove battery.
- Remove plastic tab marked PULL.
Adjust the battery contacts
- Use wrench to slightly lift 4 metal tabs as shown.
- Use wrench to slightly lift 2 bottom tabs as shown.
- Insert battery (do not close battery door yet).
Test the remote
Carefully press each button and check to ensure the blue light on the remote blinks continuously, as long as the button is pressed.
Close it back up
- Place the battery door to cover the battery, as shown.
- Rotate the door so the notch points towards the "unlock" icon.
- Use the wrench to rotate the battery door so the notch points to the "lock" icon.